Repairing and flocking a dashboard (specifically, a Destroyed Datsun 240Z dashboard brought back to life)
If you’re a person who’s in to old cars, you’ve probably experienced cracked or damaged dashboards. This is huge in the Datsun community where people commonly pay $1,000+ for NOS or remanufactured dashboards, or go with a simple dash cap for nearly $200 (see here for an example.) None of these options are very good.
I’m here to tell you that there are other options out there, for less money than even slapping a cap on the dashboard, and it will look better too. Flocking your dashboard will result in a suede-like finish from modern rally cars, and is also relatively easy to repair in the future. All you need is several hours of time, a little patience and hard work, and a few parts:
Parts list
I’ve listed out everything that I used on this project on amazon. You’ll notice that you should have around $100 into this by the time you’re done. I noted which items you may need more of if your dash is severely damaged and which items are reusable:
- black flocking - 1 bag should be enough
- 3m super77 spray adhesive - 1 new bottle ought to be enough
- bondo with hardener - you may need more than one of these depending on how badly damaged your dash is
- 2x high build primer - again, you may need more depending on how bad the damage is
- 2x black spray paint
- 220 grit sandpaper roll - you won’t use all of this
- 400 grit sandpaper roll - you won’t use all of this
- water spray bottle - reusable!
- sanding block kit - reusable!
- razor knife - reusable!
Planning
We’re going to follow roughly these steps:
- removal
- cutting away bad material
- cleaning
- bondoing + sanding
- painting + sanding
- flocking
- reinstall
How to
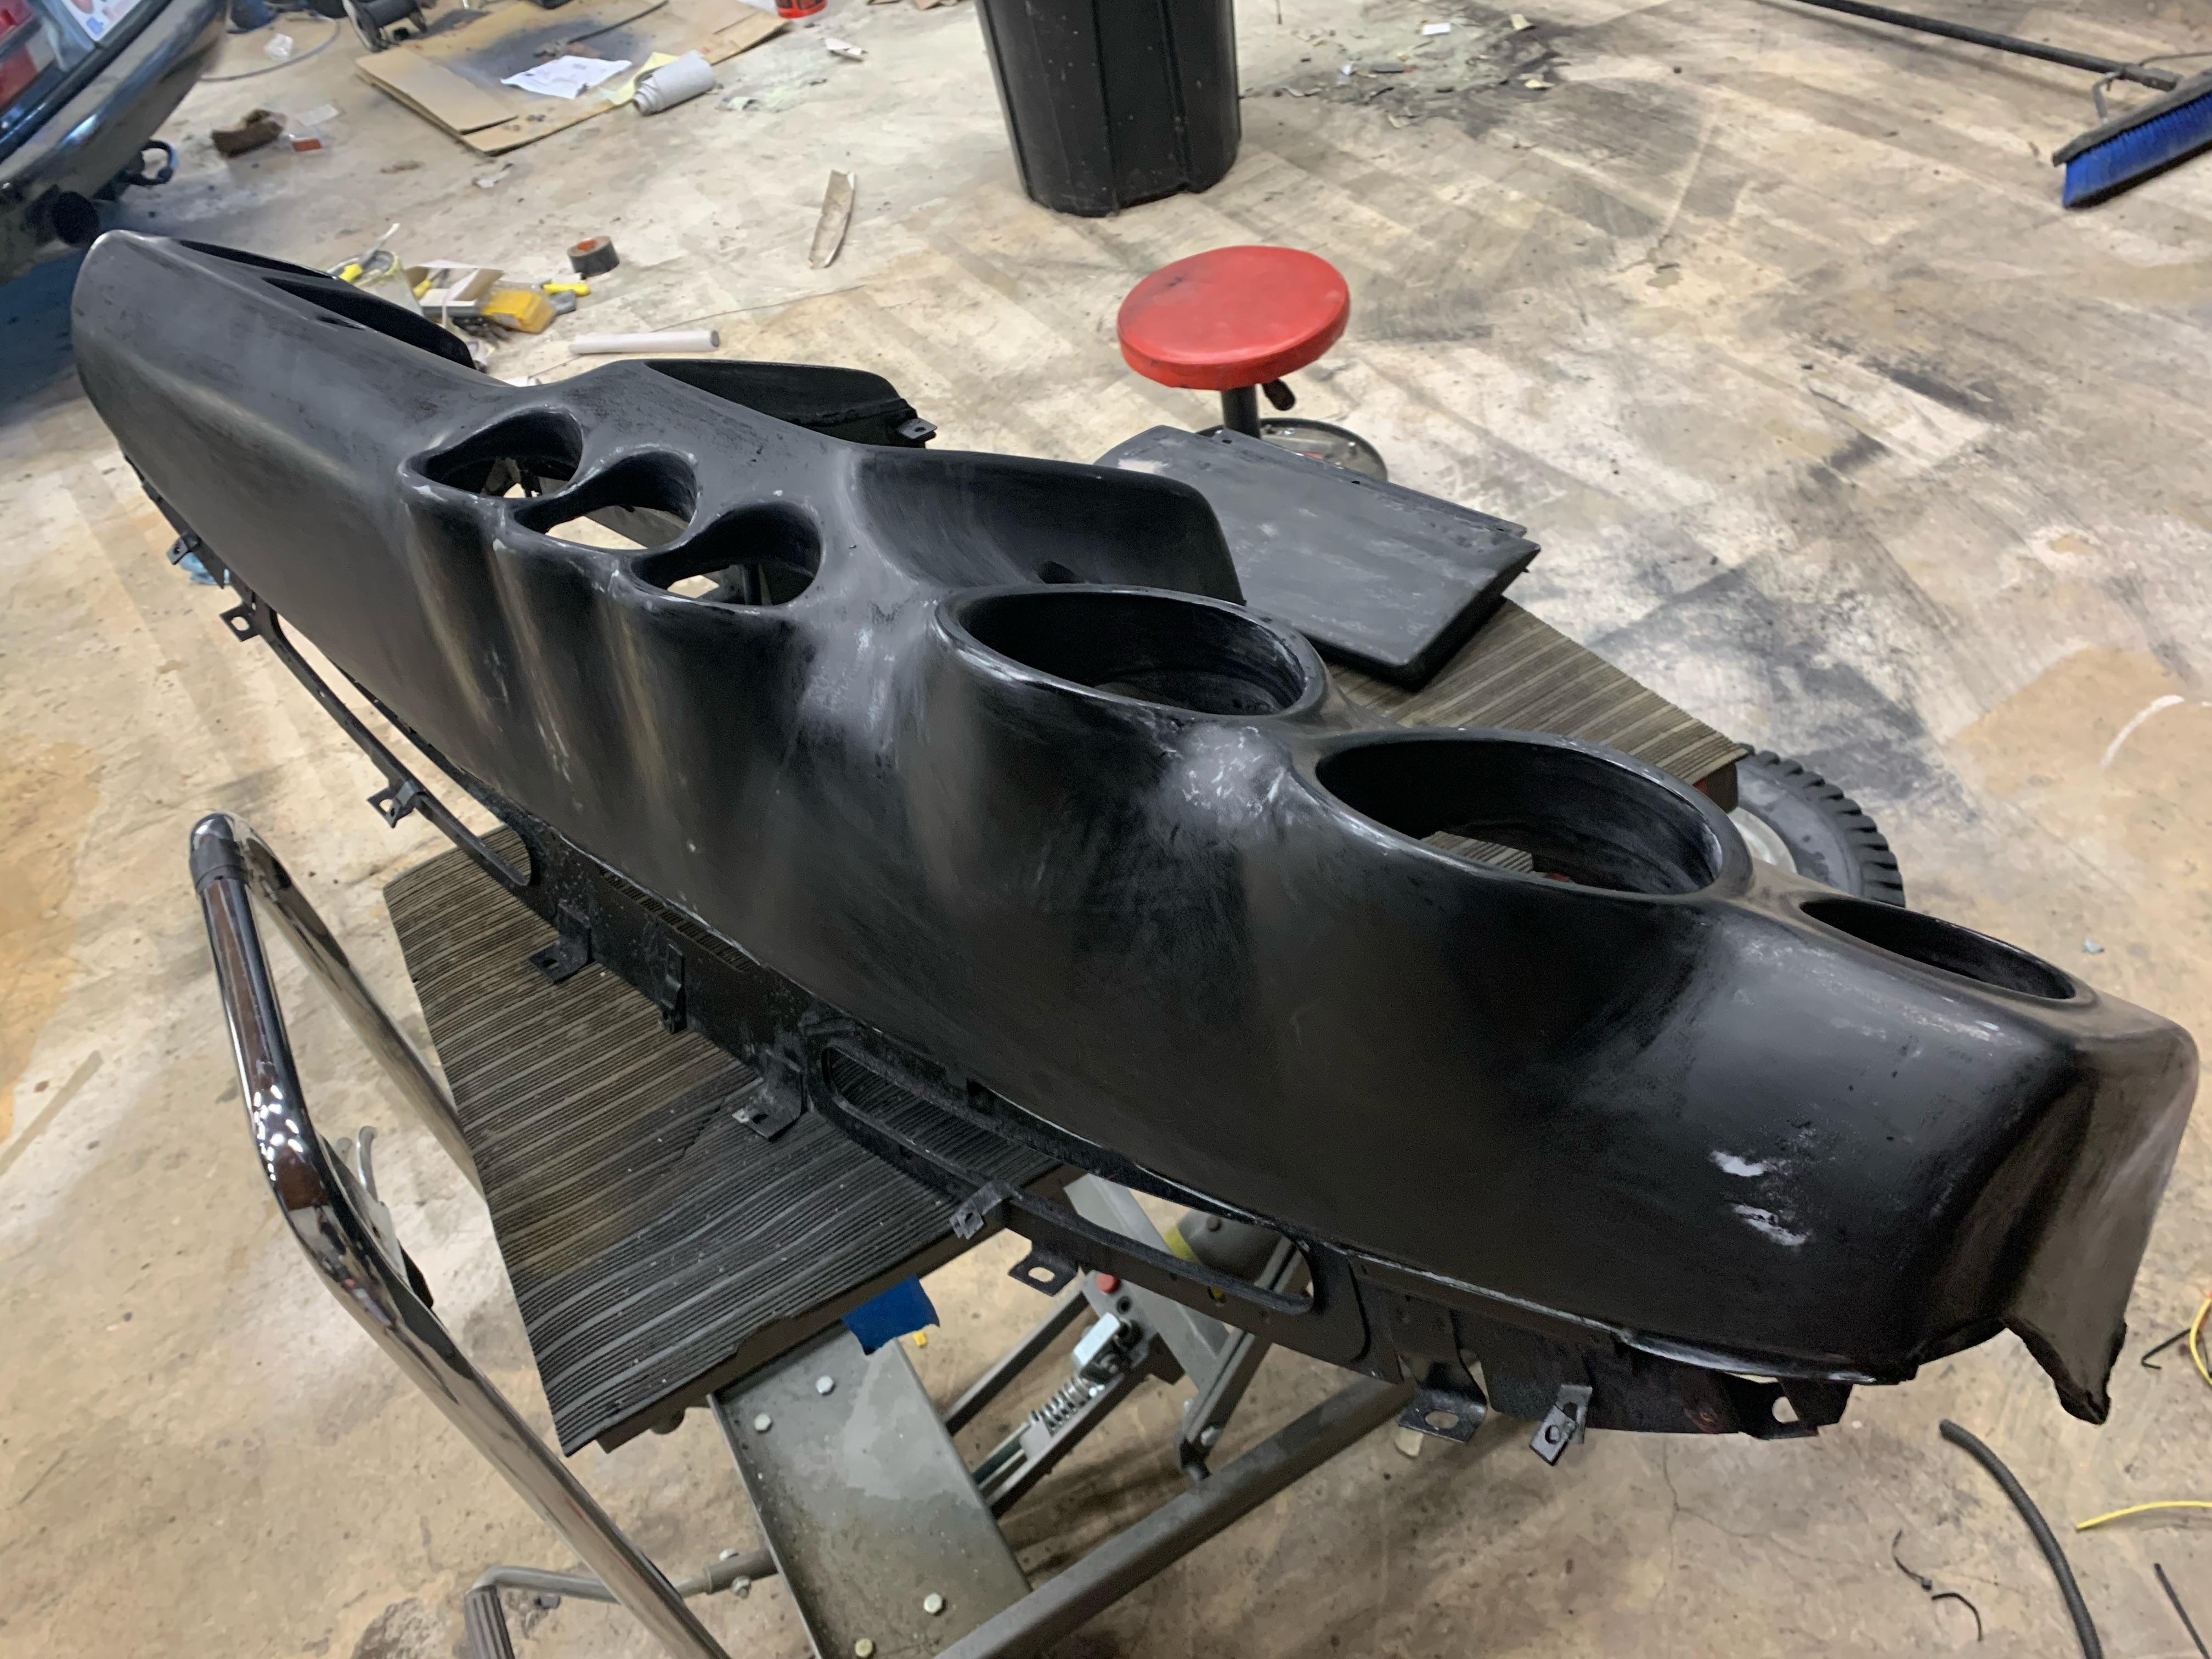
Step 1 - removal
Remove the dashboard. This can be a big job depending on your car. I recommend being as careful as possible here. Bag up and label screws, make sure you know which connectors go where, try not to break things. You don’t want to be ordering up new trim because you decided to muscle the dashboard out of the car.
You should now have a dash sitting on the ground that looks like this: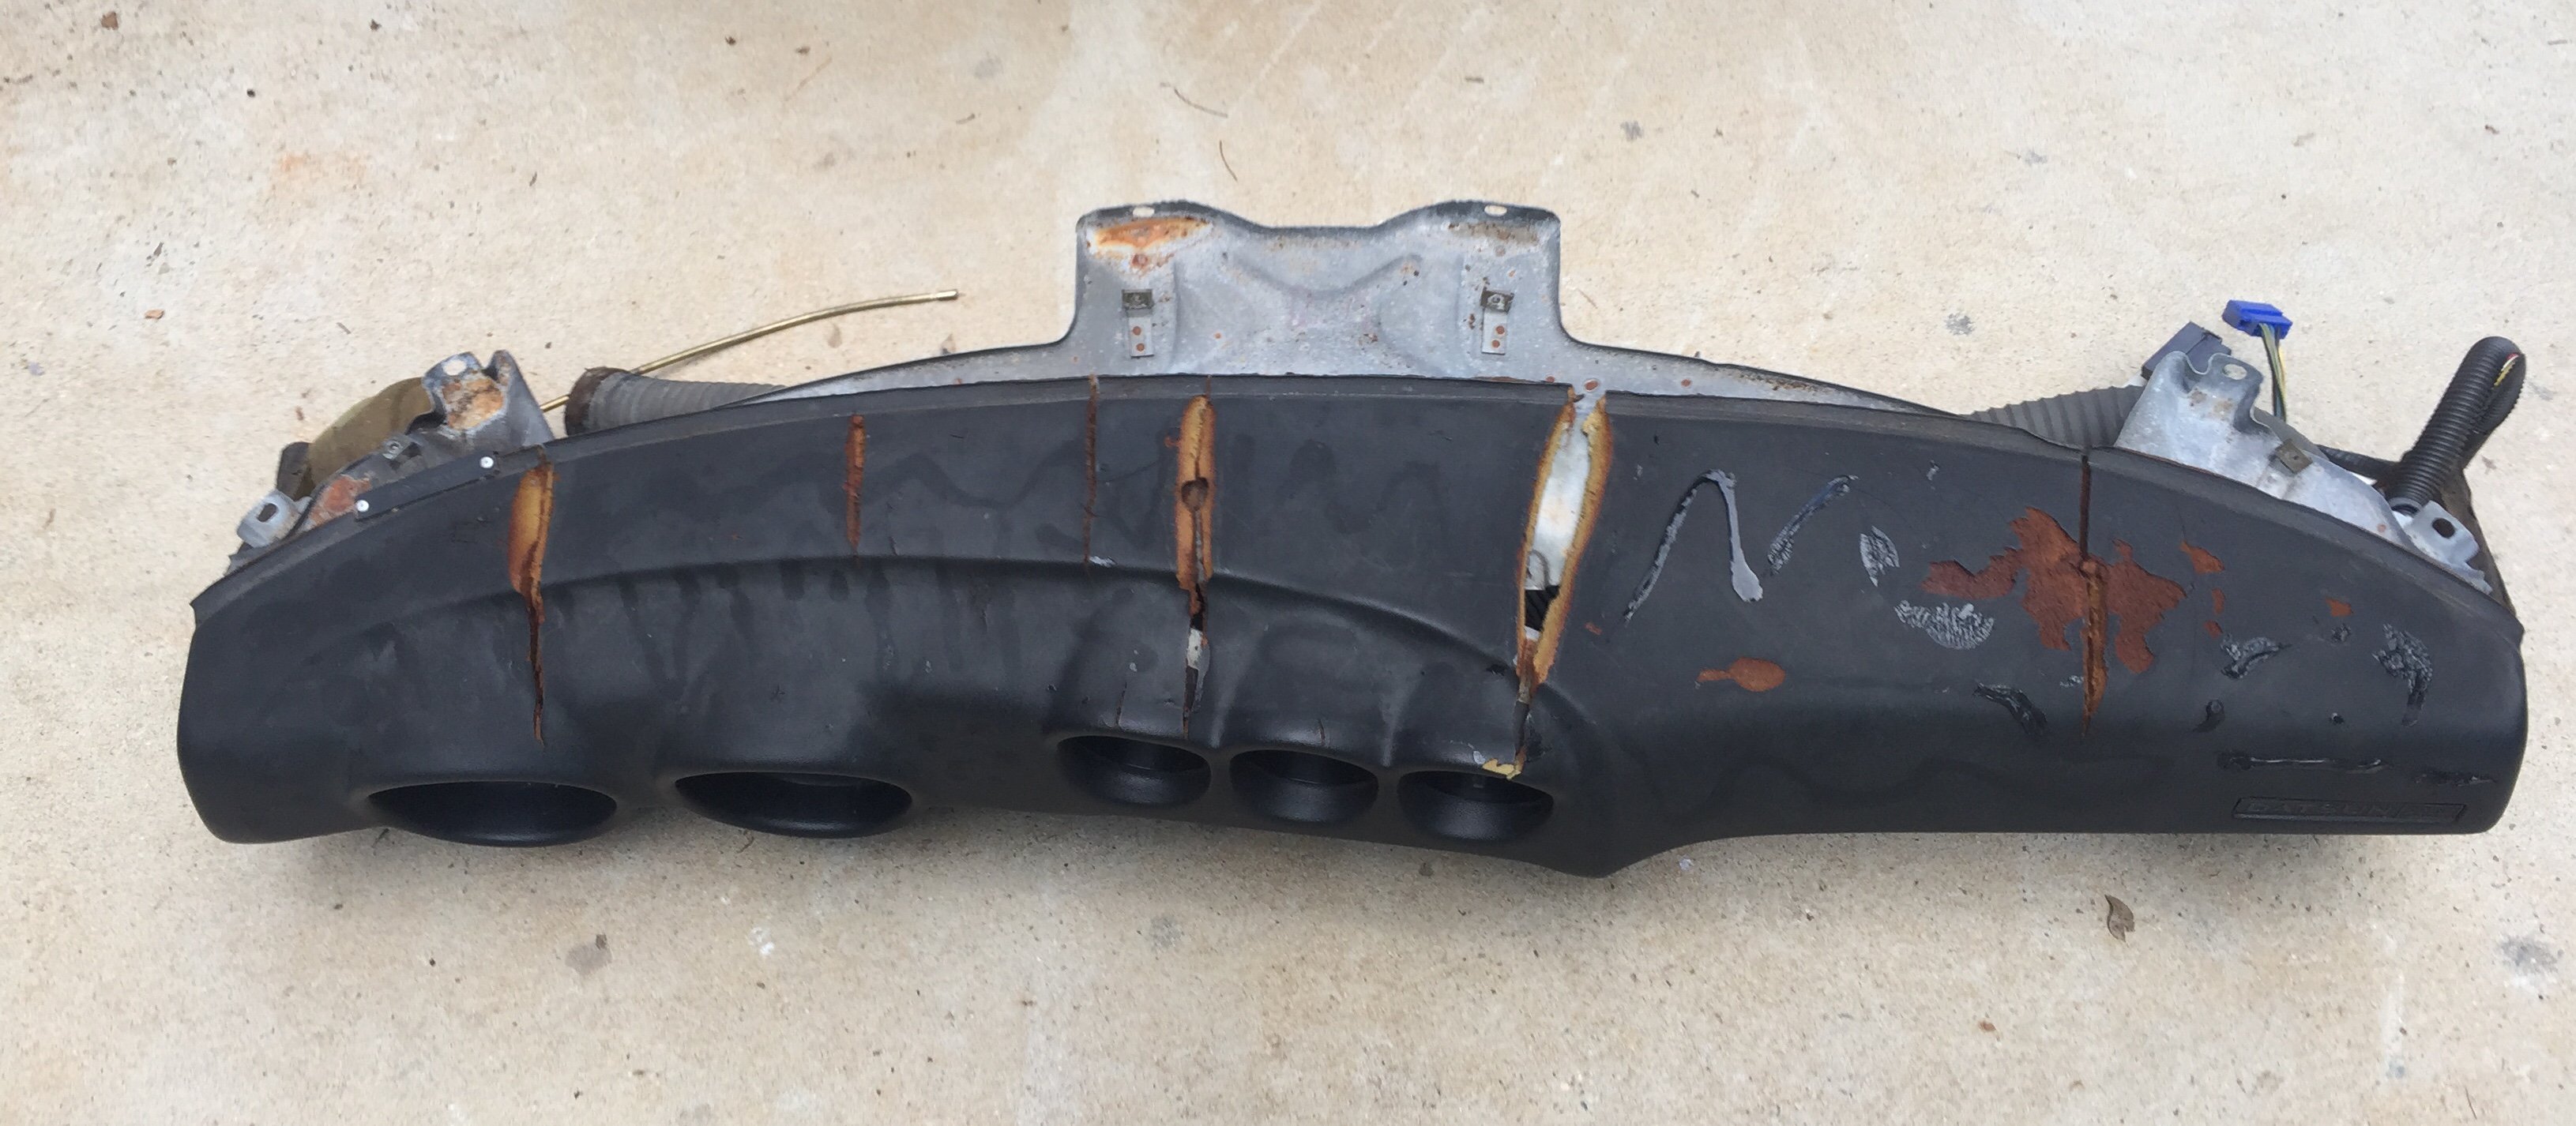
(note: This picture wasn’t the dash that appears in the rest of the pics. This is one that I found on google images. The dashboard in the rest of the pictures had similar damage in the same spots.)
Step 2 - cutting
When dashboards crack, they curl. Cut the dashboard all the way back to where it’s no longer curling using a razor knife. Your cracks might be twice the size they were prior to this step - that’s okay! There’s no turning back now.
Step 3 - cleaning
Clean your dashboard really well with soapy water and clean it well between layers of work as you continue through the steps. I just use dish soap. Dust and dirt are going to be your enemy - they could cause imperfections or cause bad adhesion between any of the bondo, paint, or spray adhesive products that we’re going to use.
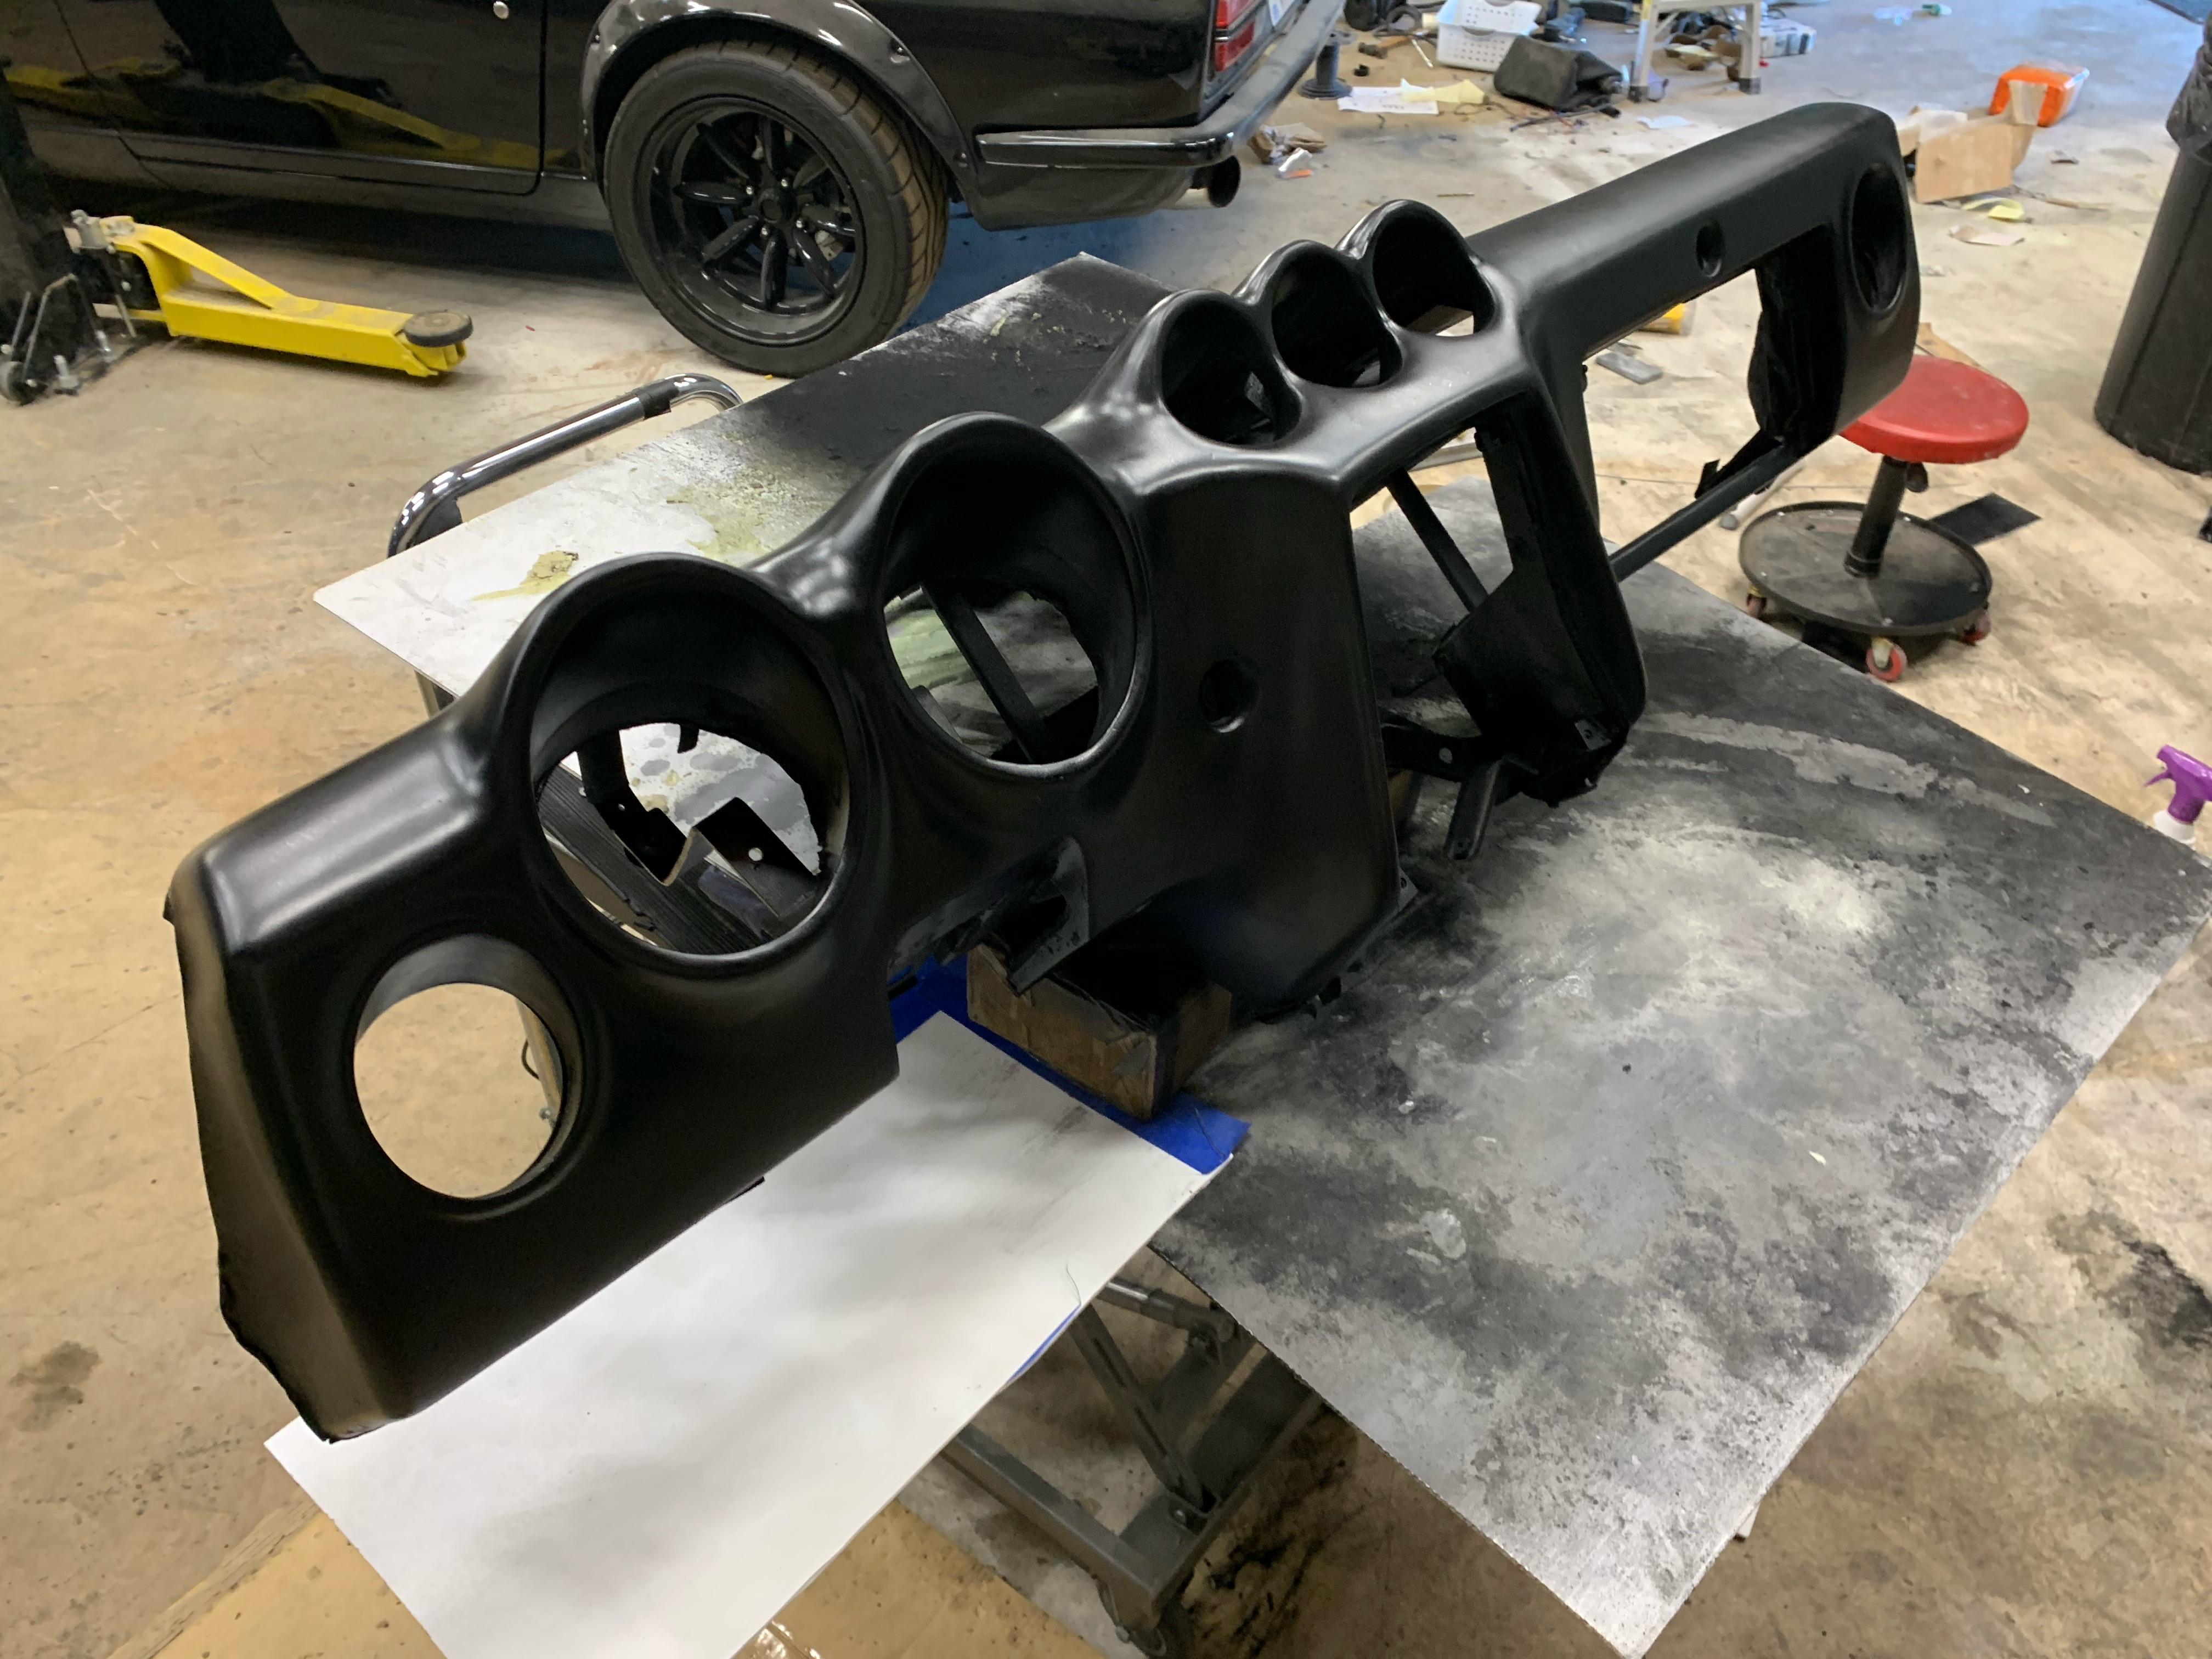
Step 4 - bondo + high build primer + sanding
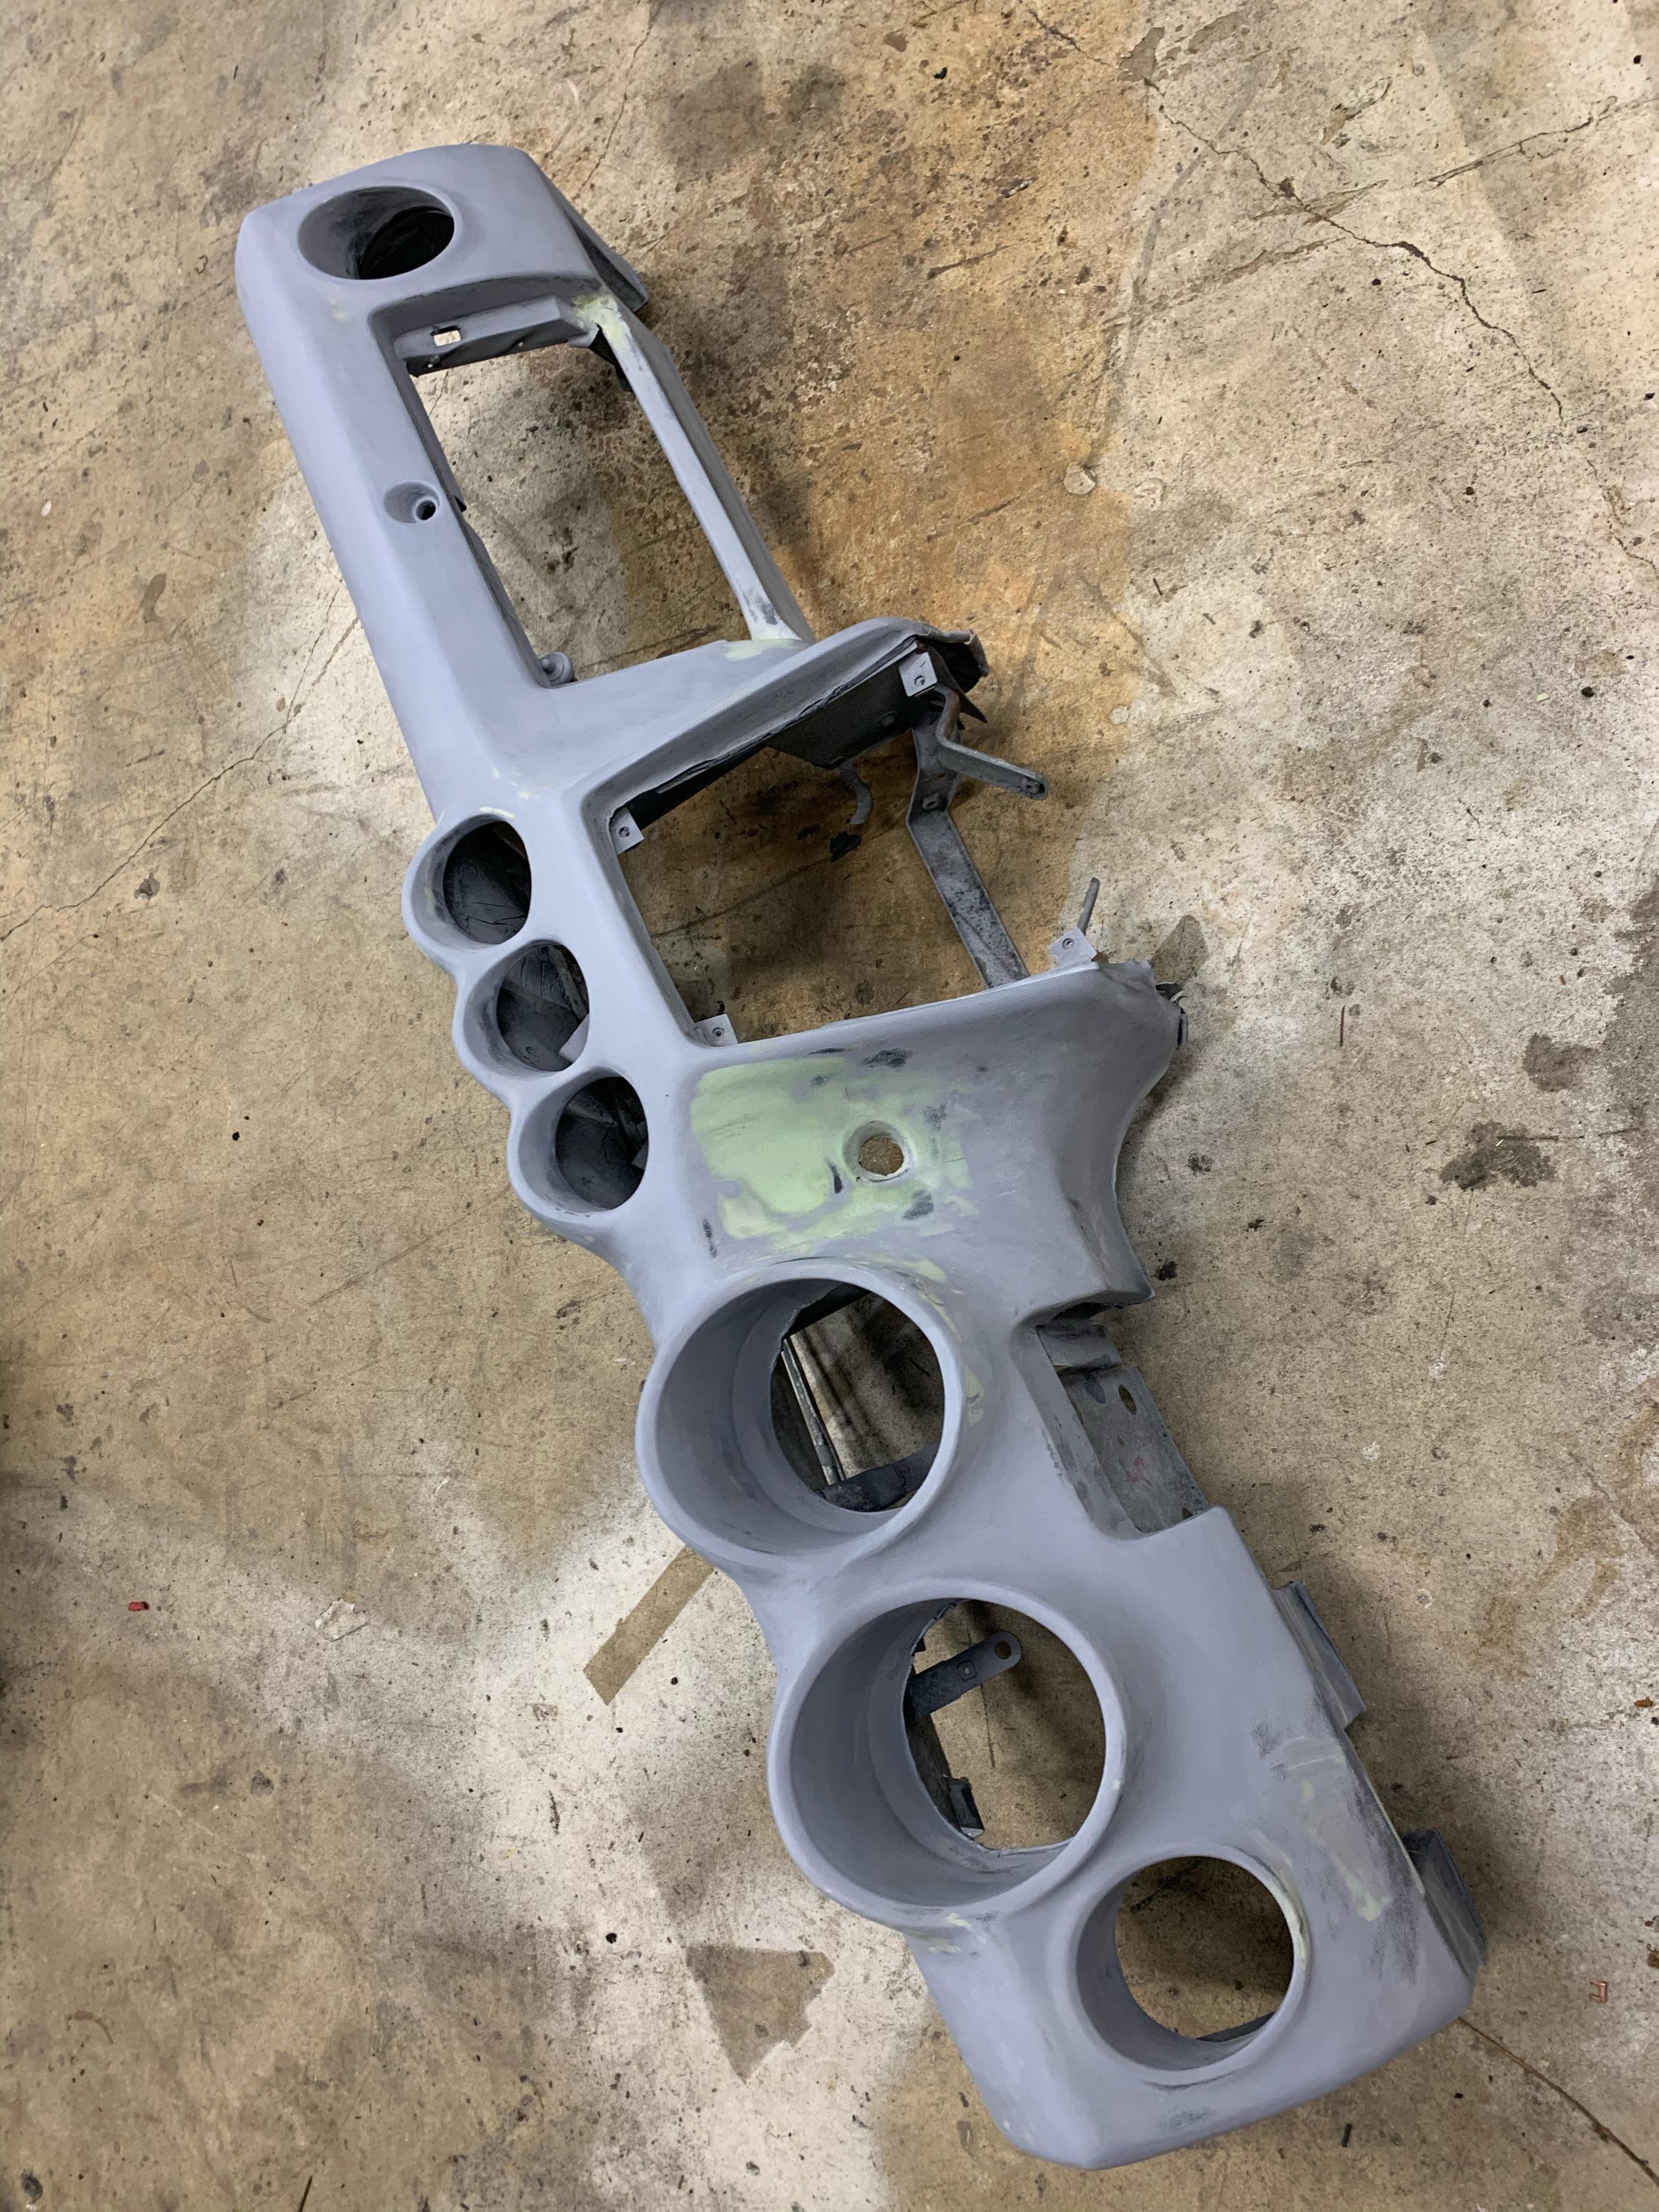
This is the most time consuming step. Tons of and tons of bondo and lots and lots of sanding. We are taking an old dashboard skeleton and re-shaping it out of bondo. You might end up with a full day into this.
Before I begin, I spray high build primer over the whole dashboard. This helps me spot low or high spots and also helps me from damaging healthy plastic parts of the dash that I do not want to sand on. Any time we blast through the primer, it’s time to lay down a bit more primer.
Bondo over each of your cracks with a bondo blade, smooth it out as much as you can, sand it, and then repeat. Your bondo here must go well beyond the cracked areas of the dashboard and the entire top of the dashboard needs to be covered in at least a thin (say 1/4 inch layer) of bondo. You’re making the dash slightly taller here but it’s important that we do this. If we just bondo and smooth up to where we cut on the last step, the dashboard will just crack there within a year or two and we will be yanking the dashboard agian to repeat this same job.
As I work, I continue to spray coats of high build primer over sanded parts of the dashboard, to help spot high and low spots as I sand and to help protect good parts of the dashboard.
When sanding, I do the first several layers with 220 grit sandpaper and then use the 400 grit sandpaper before moving on to the next step. I use my sanding block kit to help get into all of the small spots and over the large humps and curves in the dashboard. If you try doing this by hand you may end up with some odd waves in your work – the same as doing bodywork on the outside of a car!
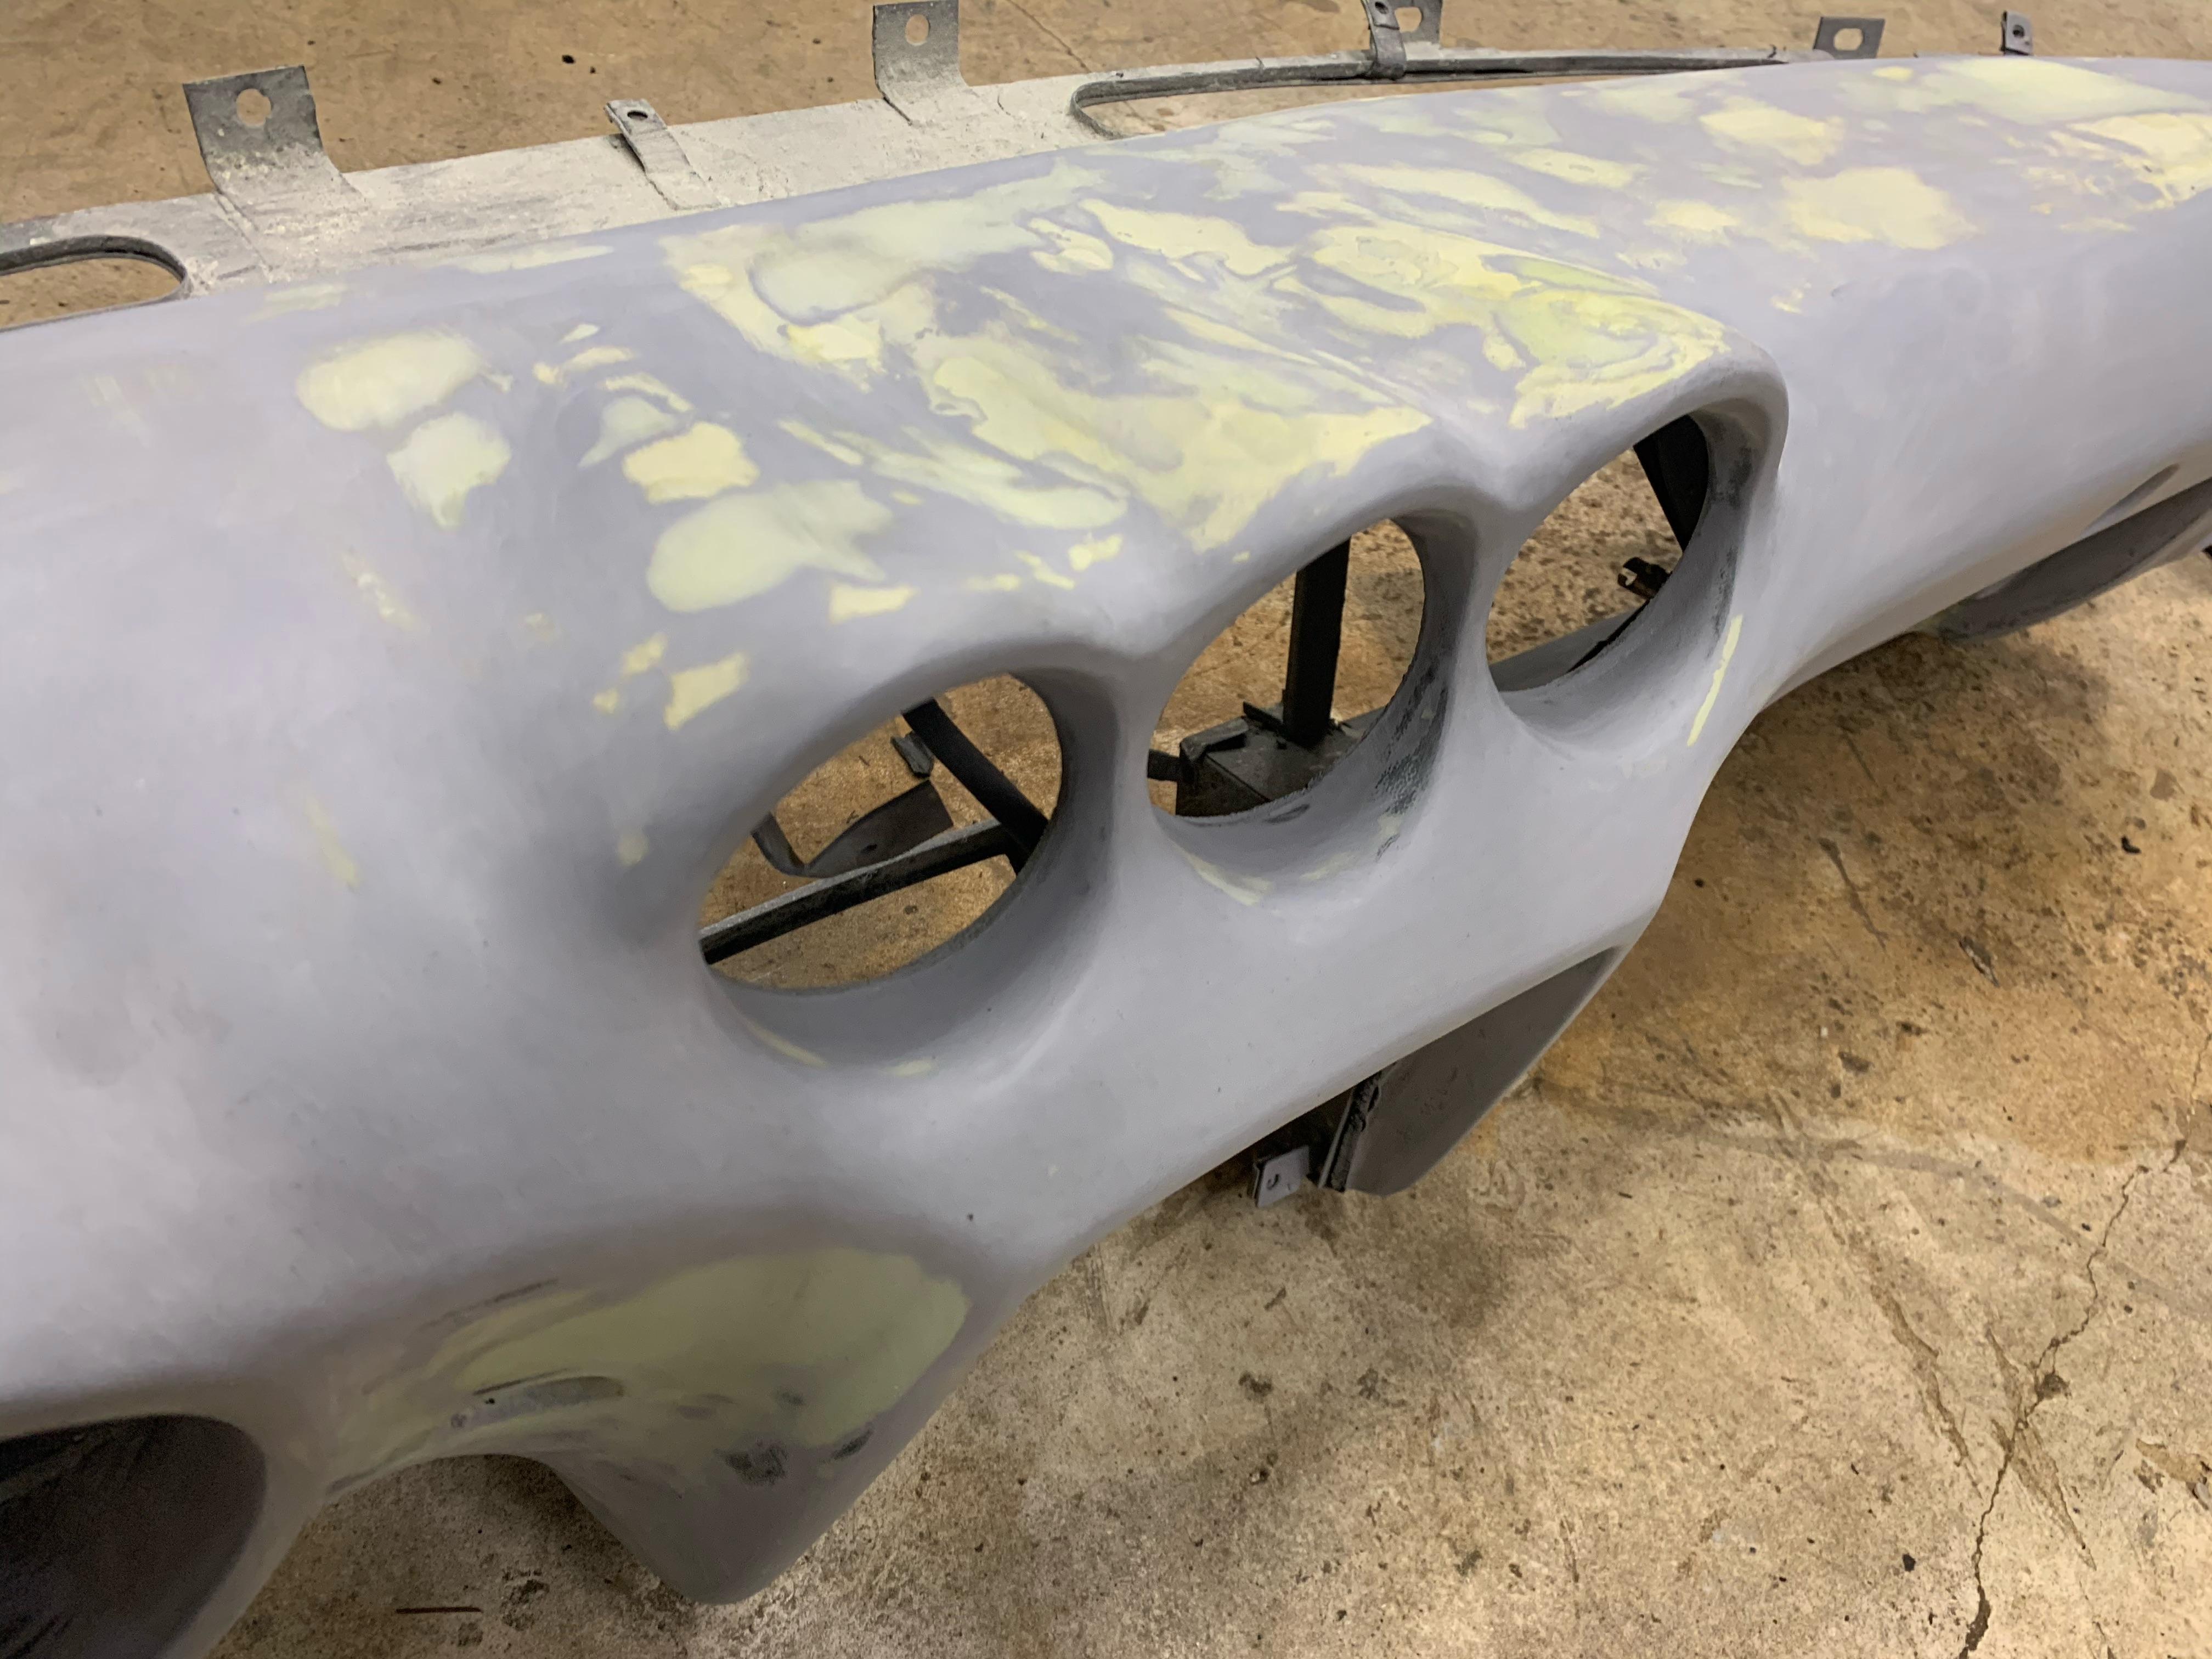
When you’re done bonding and sanding, shoot one last coat of high build primer then sand it gently and evenly with 400 grit. There should be no visible scratches, low points, etc, before moving on. You should be looking at a perfect smooth, gray dashboard when you are finished here. No bondo should be exposed
Here you can see the many layers over the gauge clusters to get them close to right - it’s a lot!
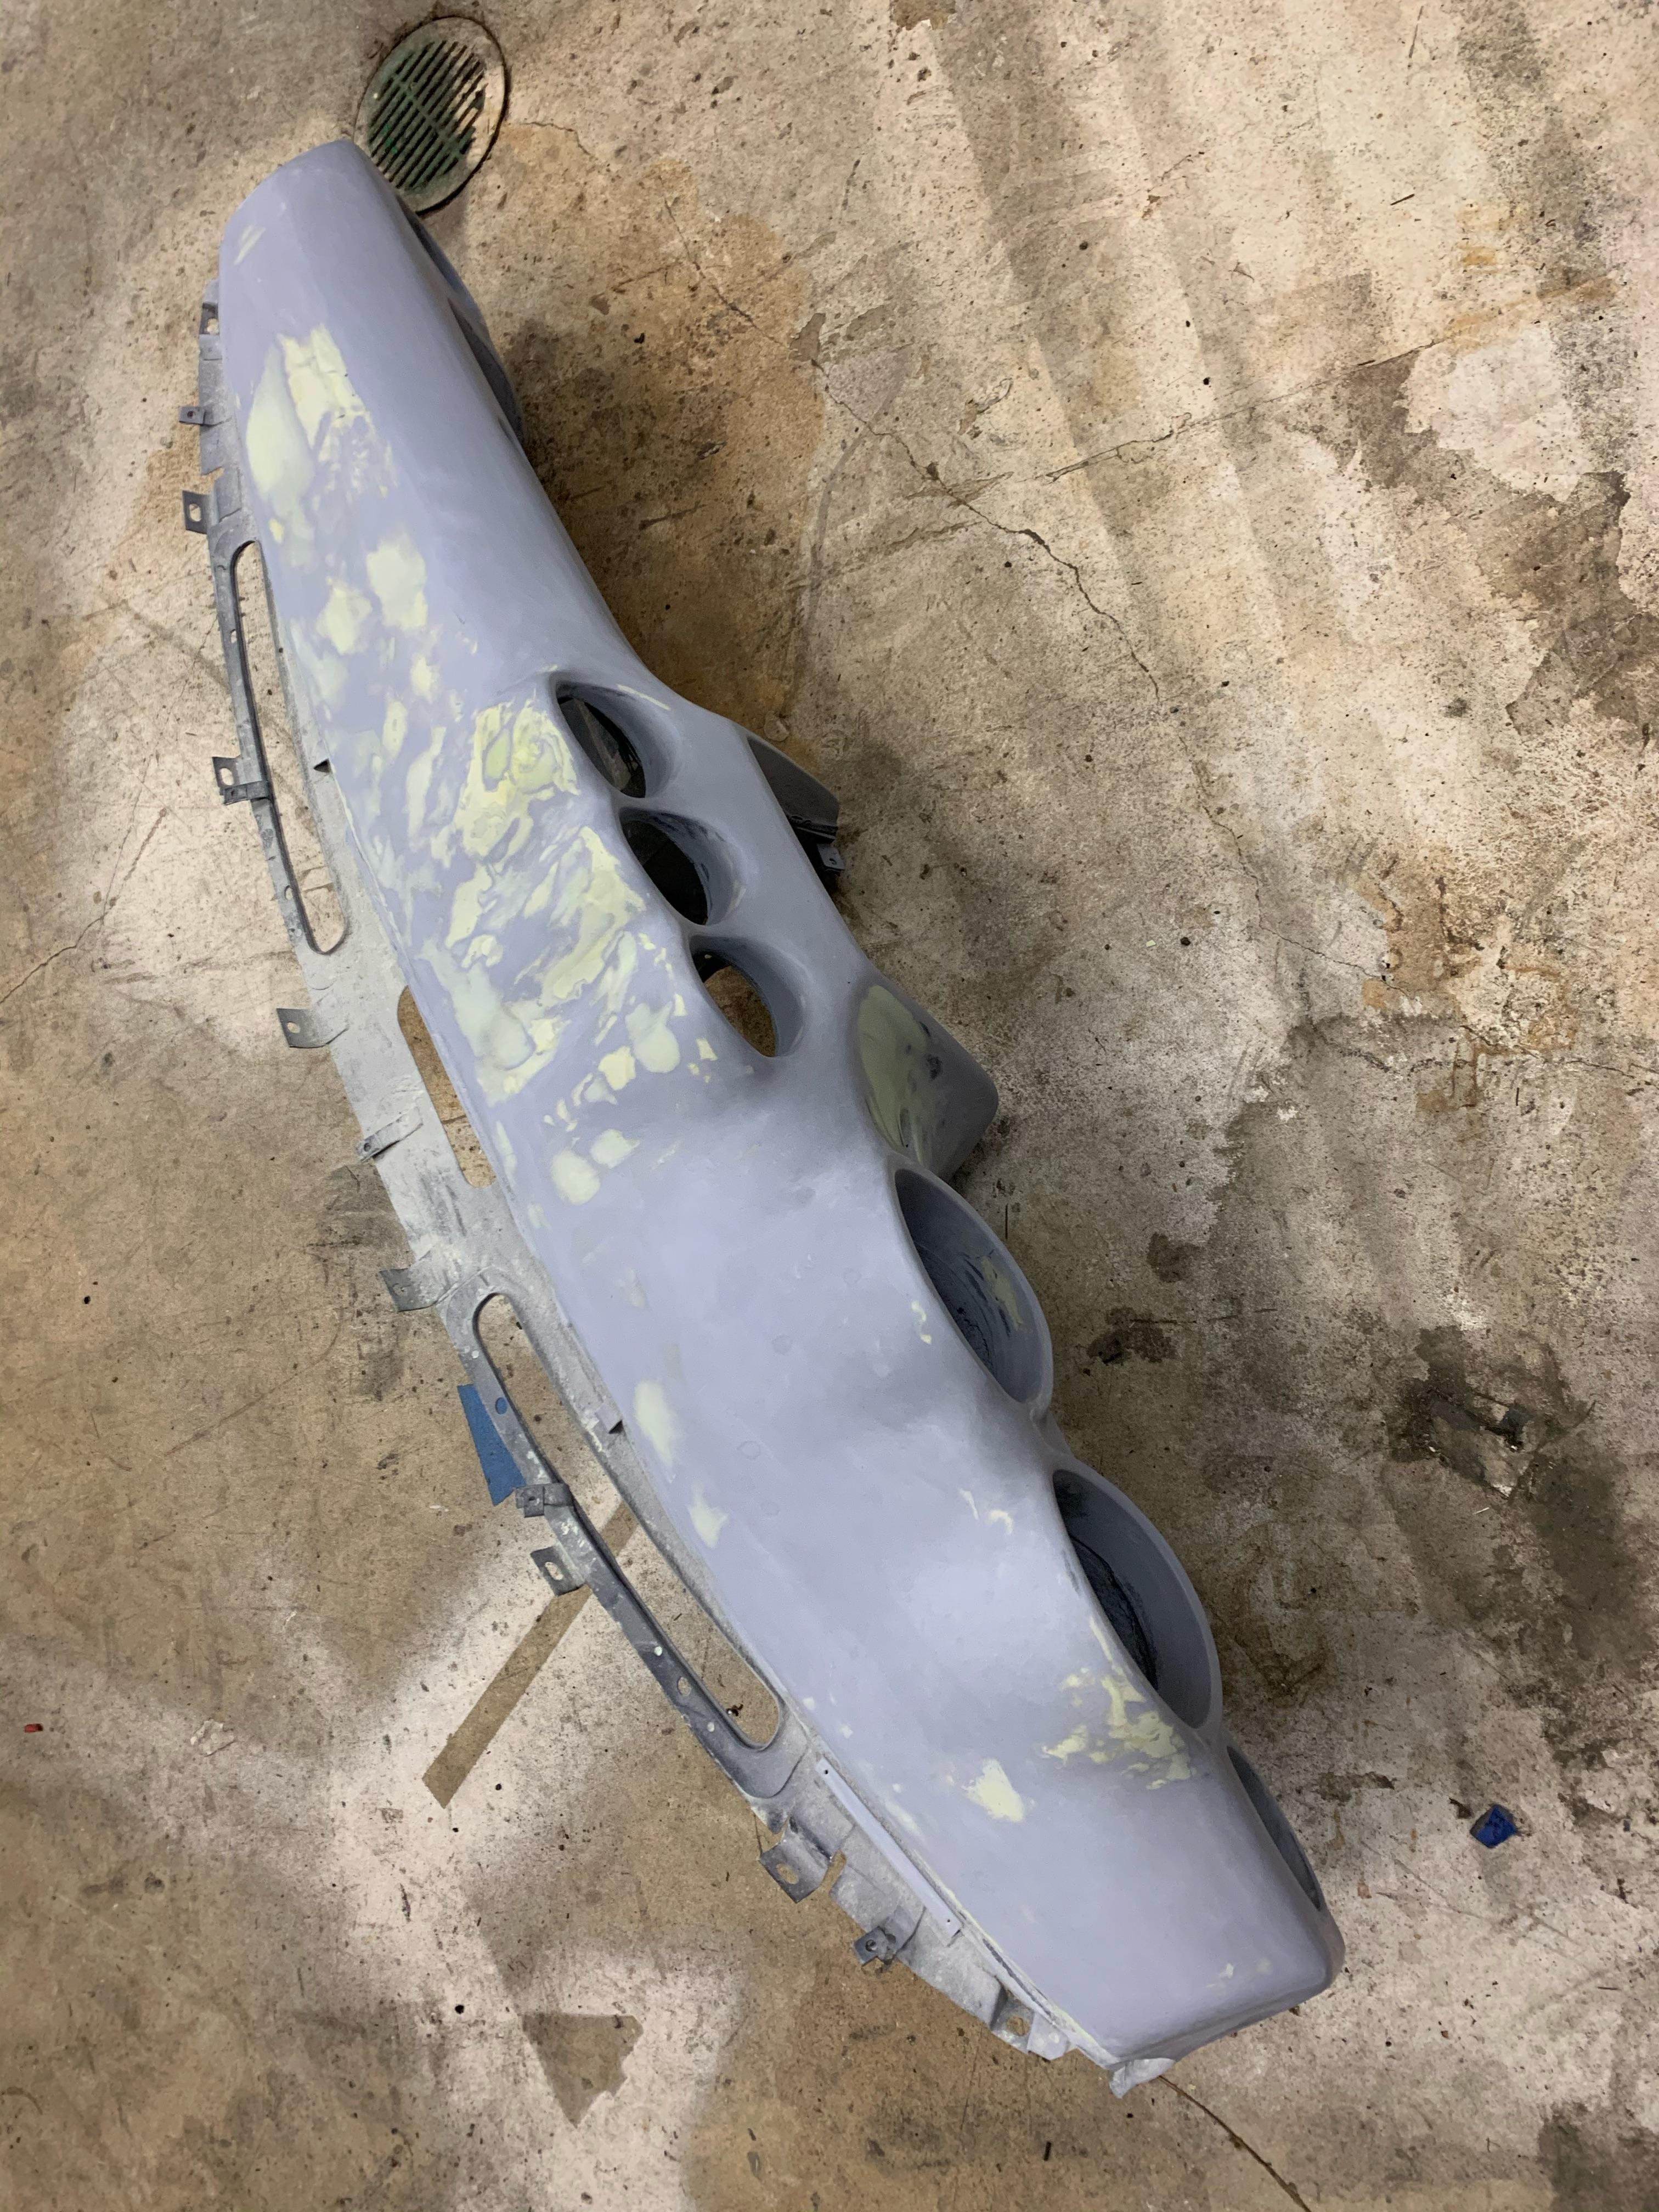
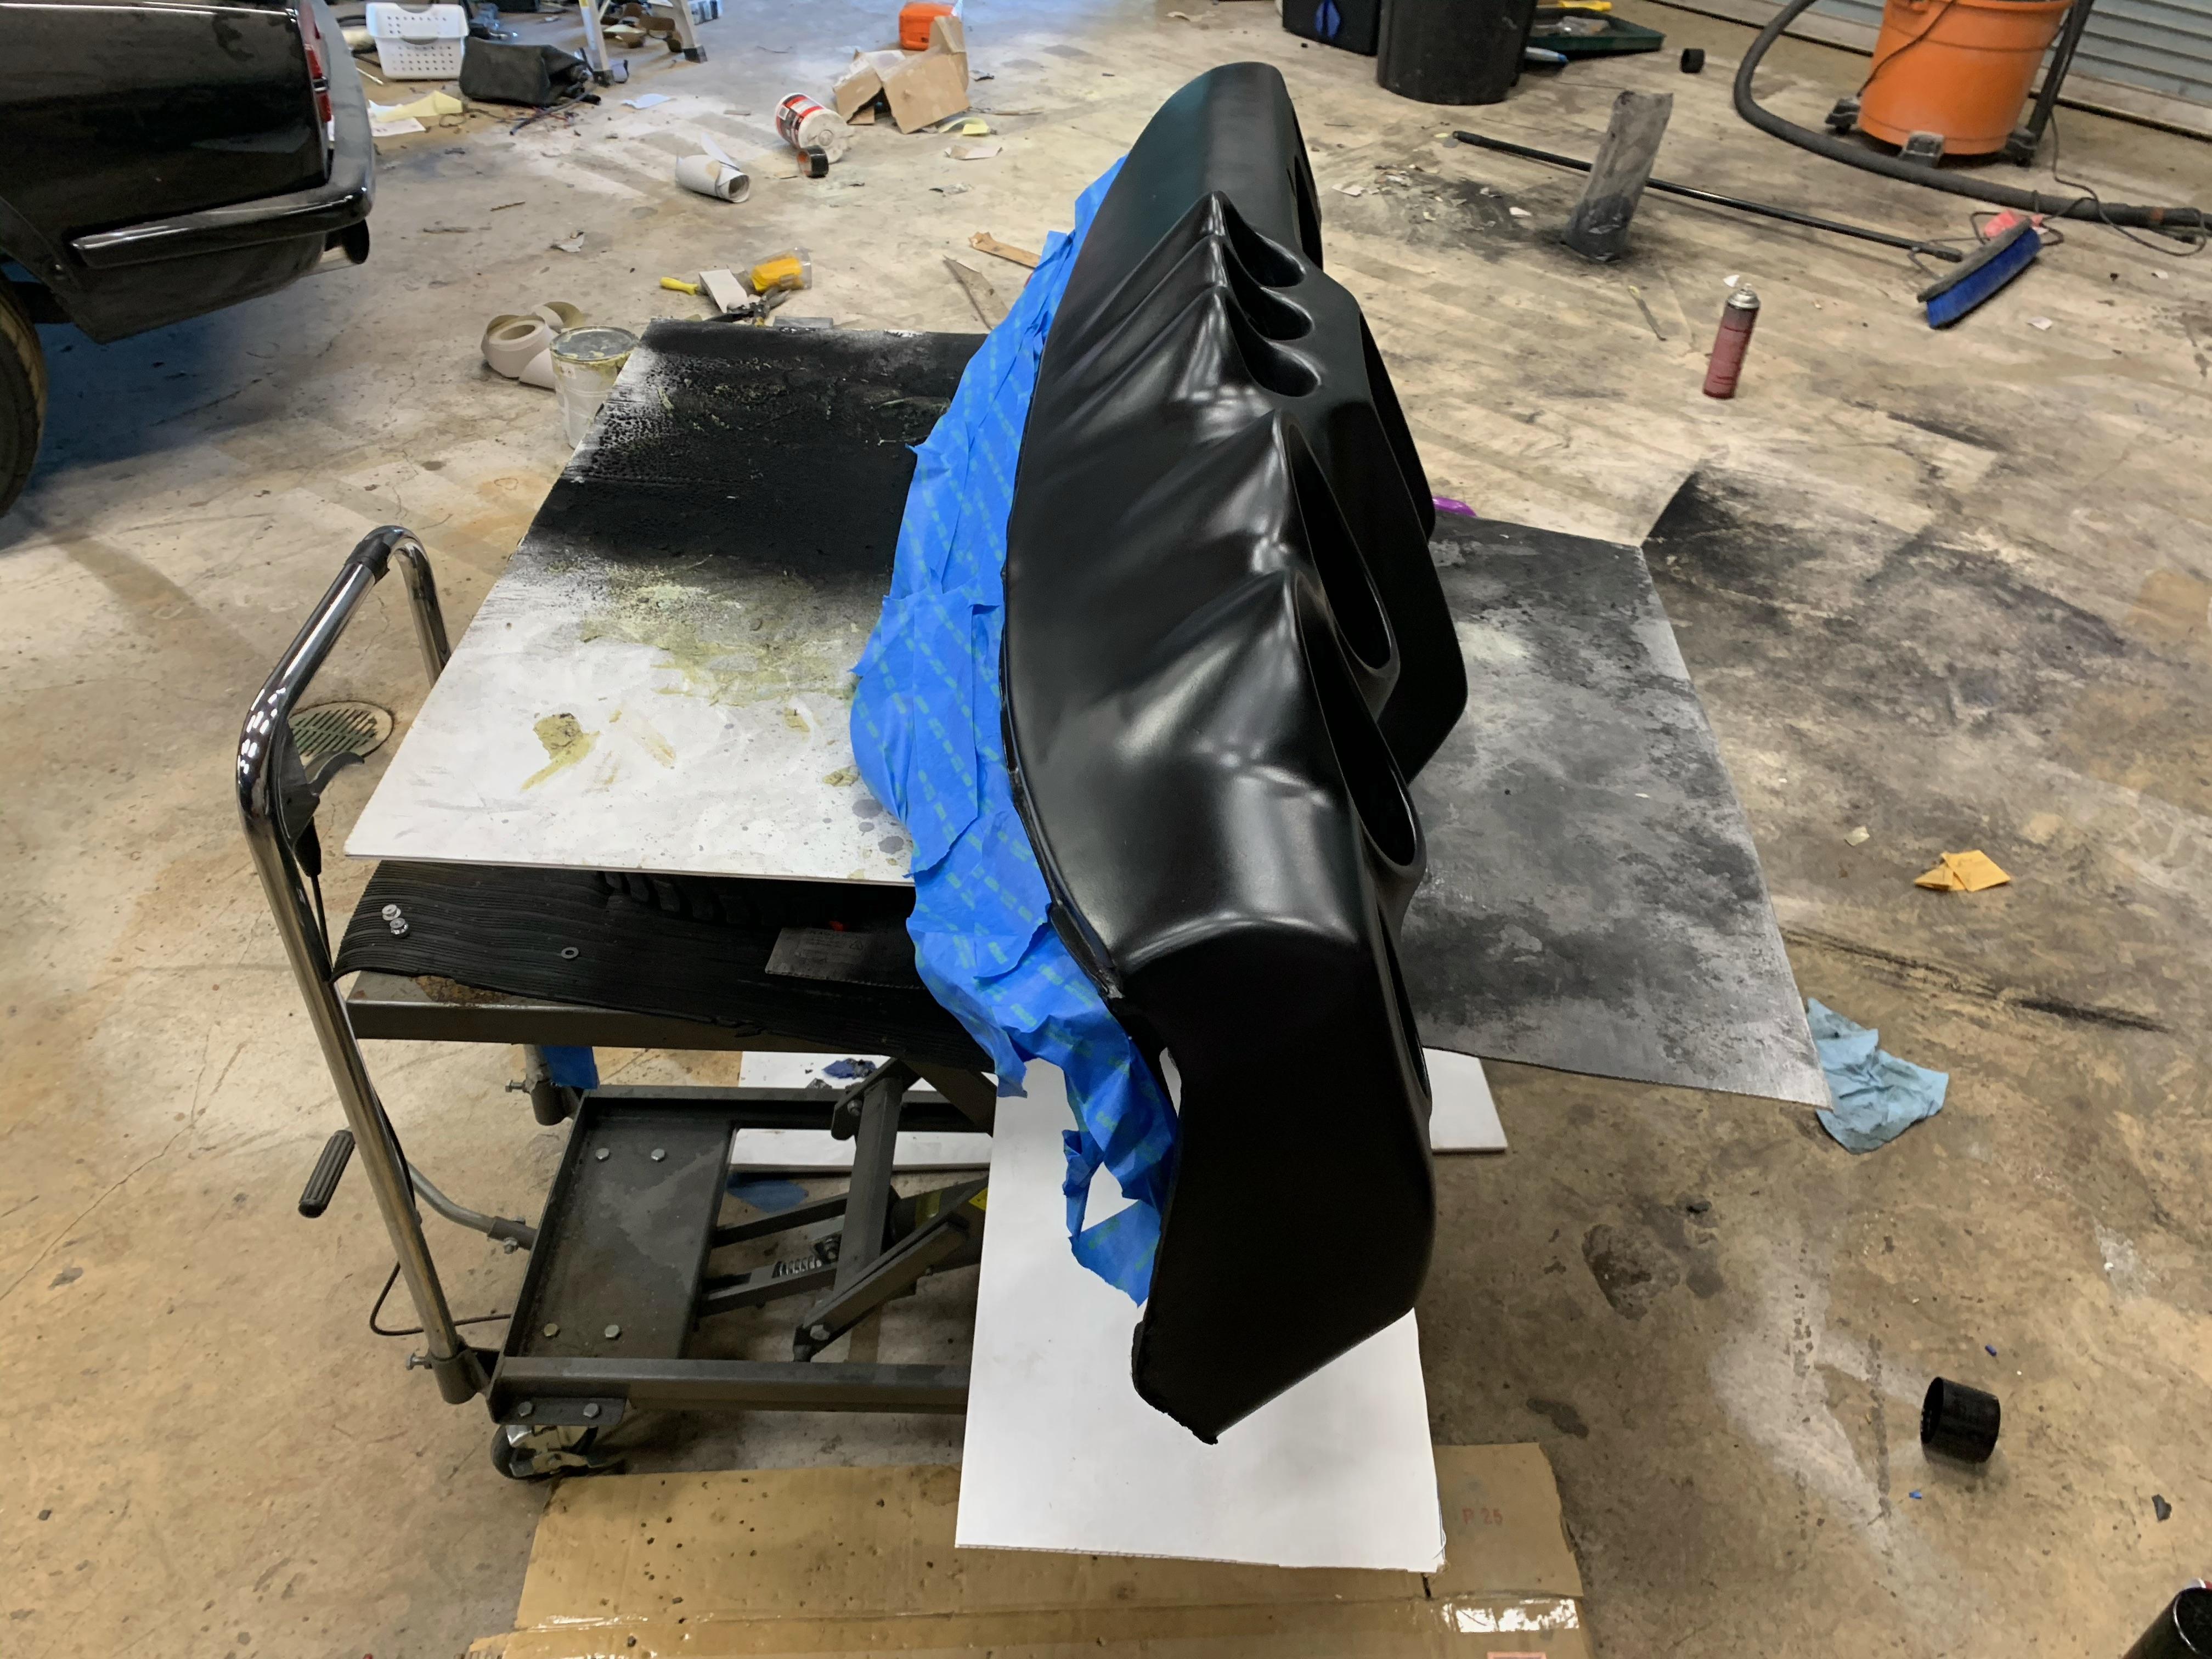
Step 5 - painting
Now that we’re done with the hard work, it’s time for things to start looking better. Coat the entire dashboard in black spray paint. Our goal here is to get a uniform, smooth, black dashboard, for us to adhere flocking material to.
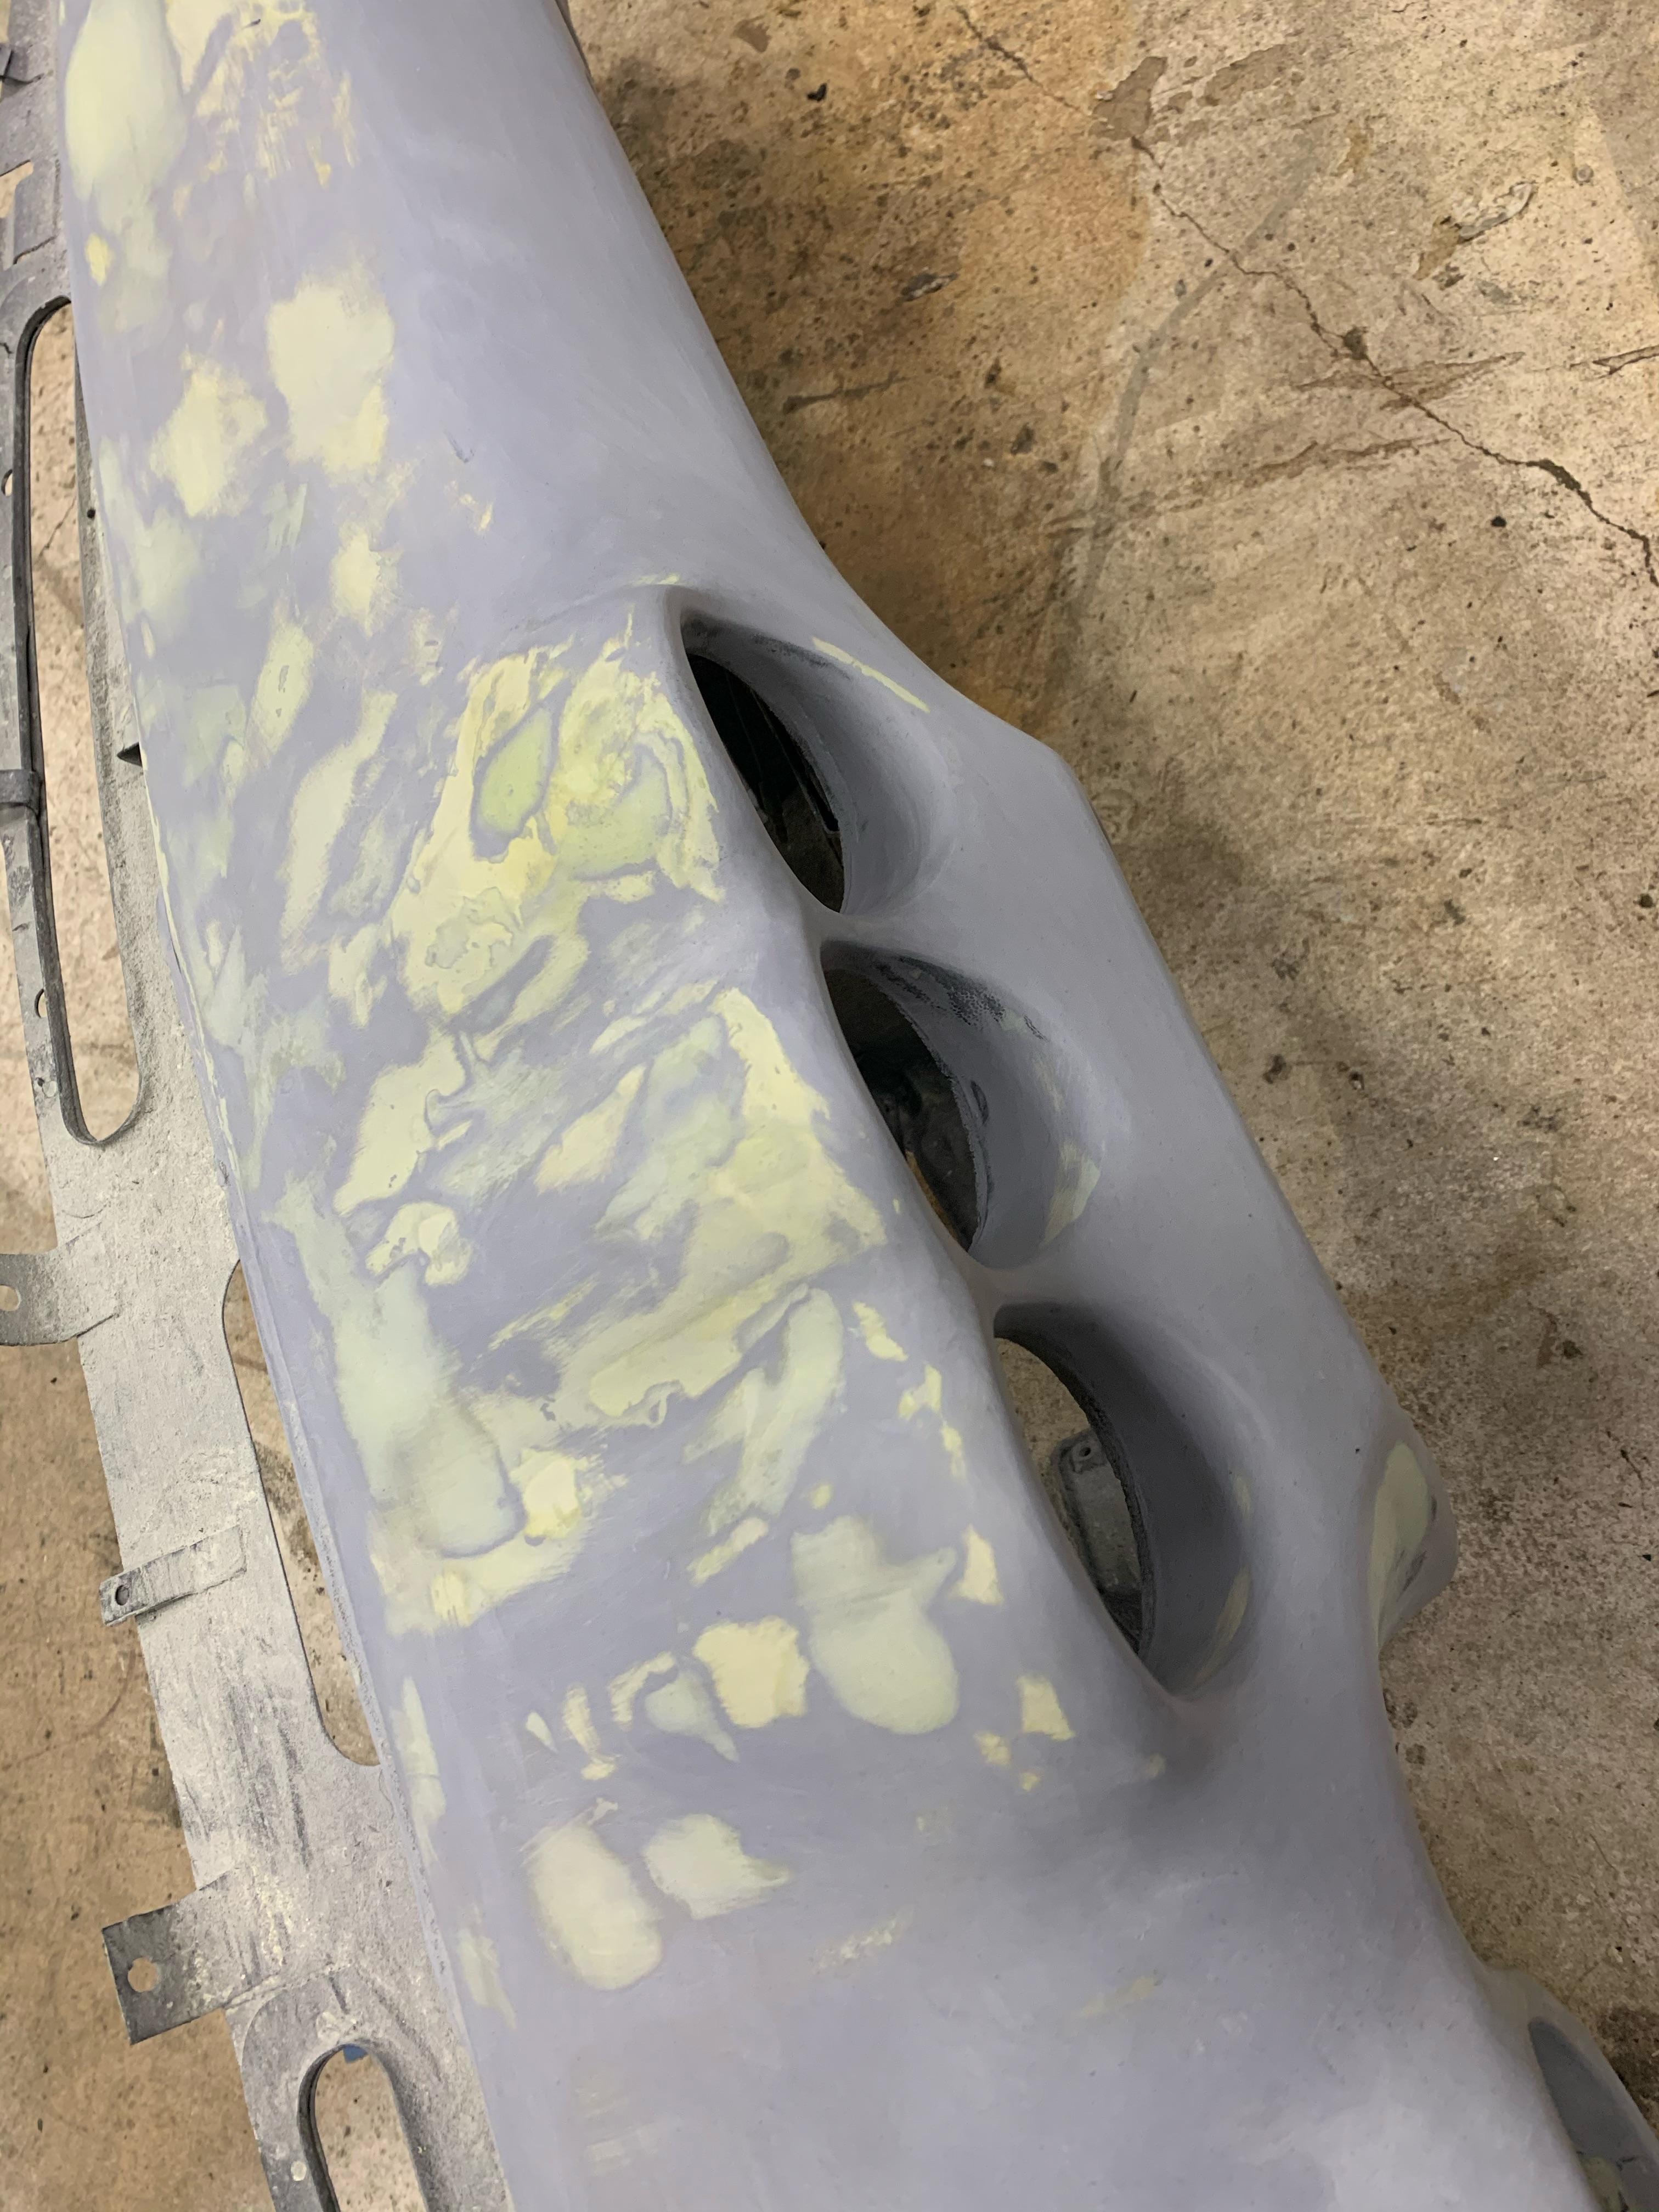
Step 6 - a little more sanding
After drying sand the 1st coat of paint to remove any imperfections. I will generally wet sand during this step, with a water spray bottle and the 400 grit sandpaper
Here you can see some spots where we completely sanded the paint away due to imperfections
Step 7 - more painting
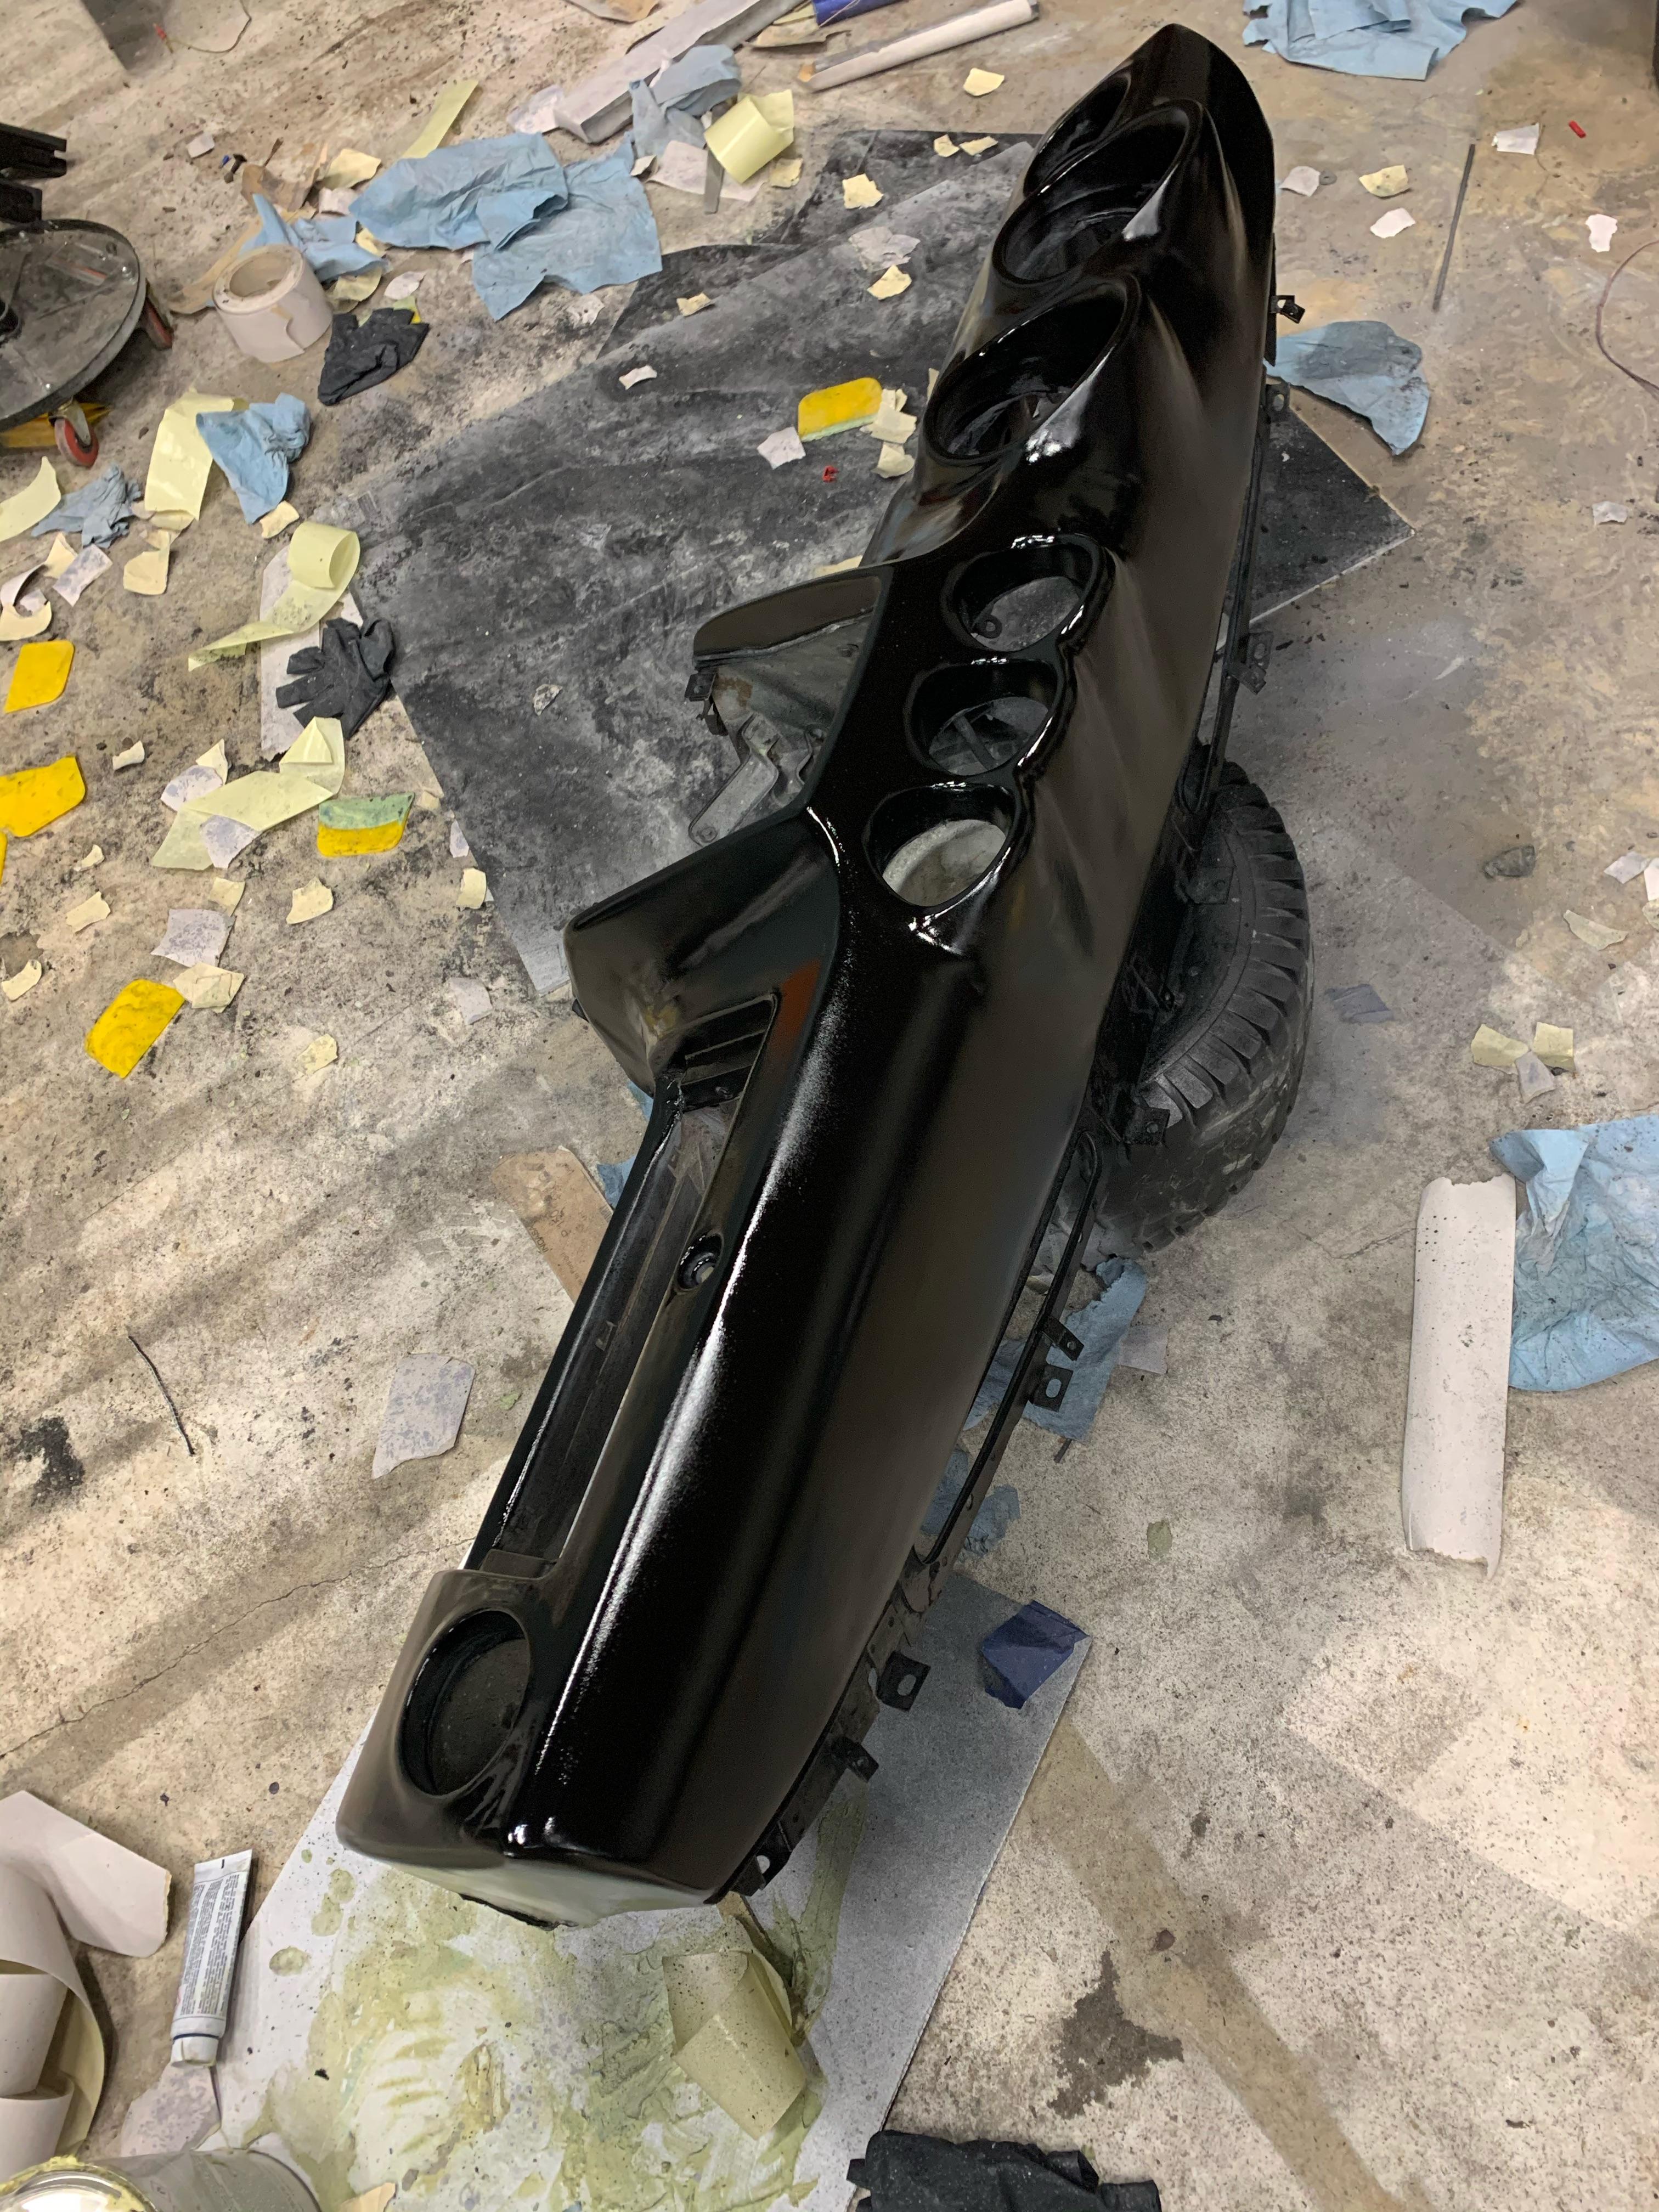
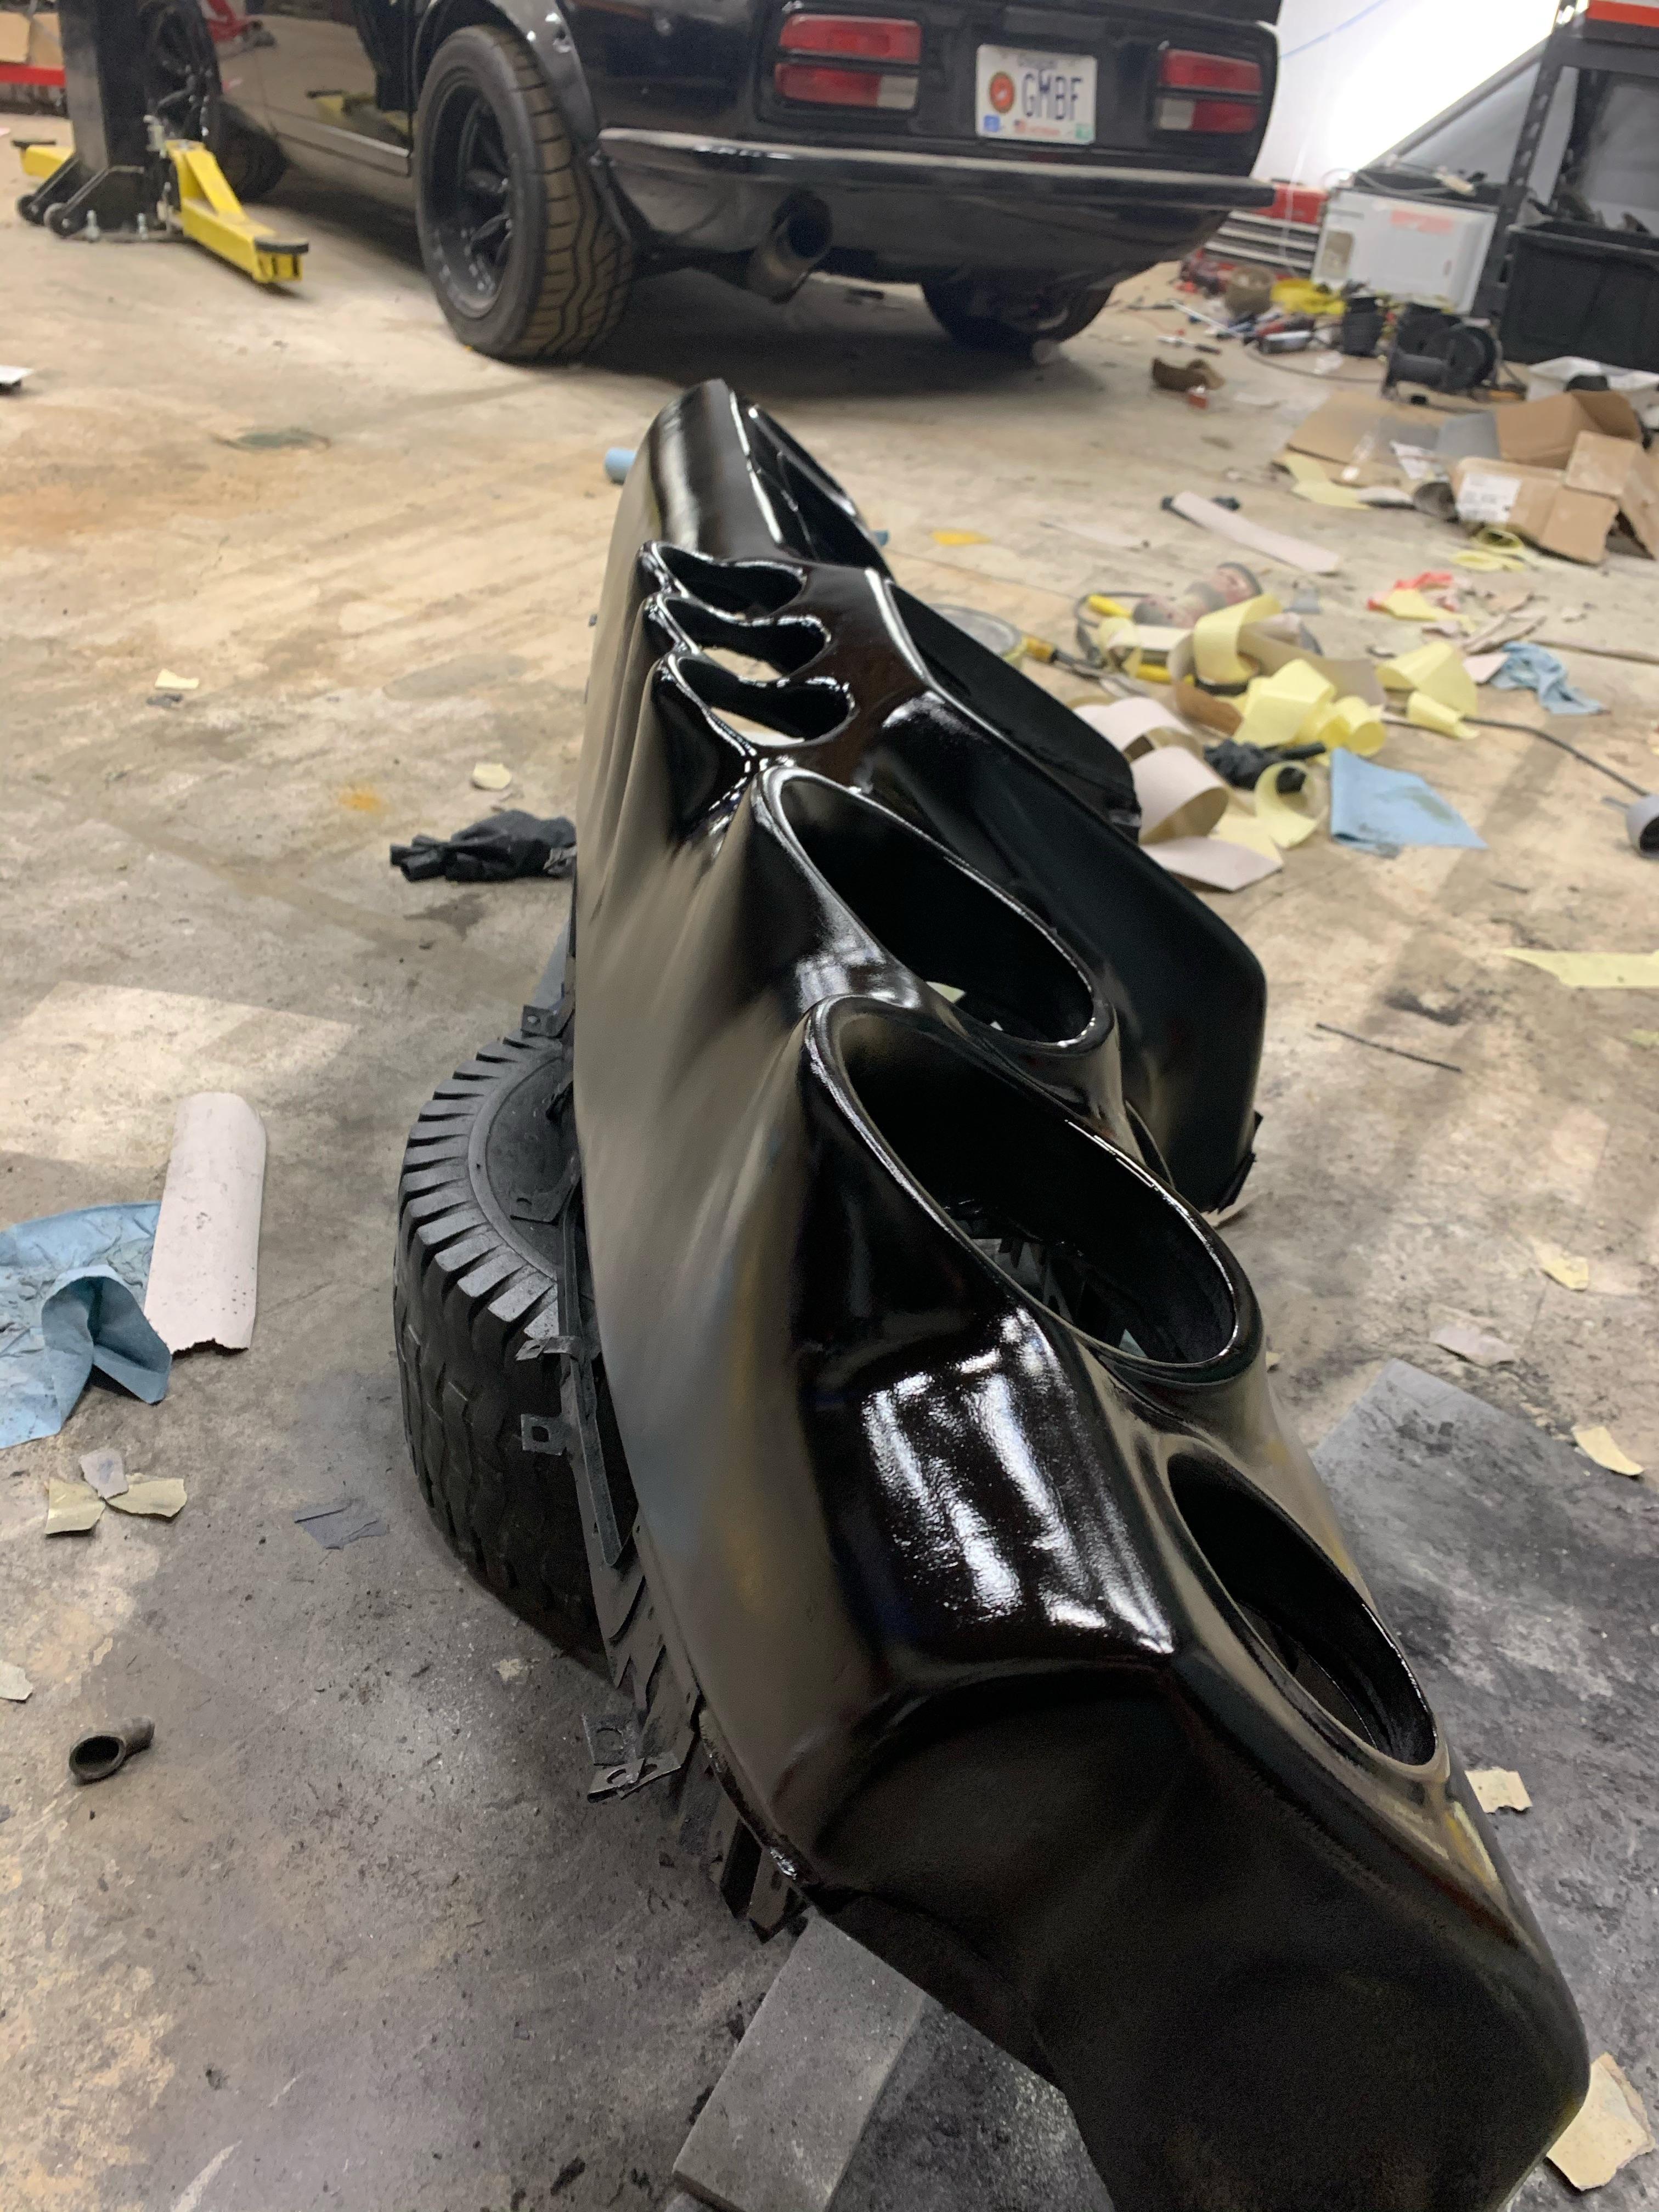
Add one more thick coat of paint, ensuring that you don’t get any runs. Let this paint dray and do not sand it. You should have a great looking, smooth, black dashboard now. It should look pretty good! If not, back up and get to sanding. The end is in sight.
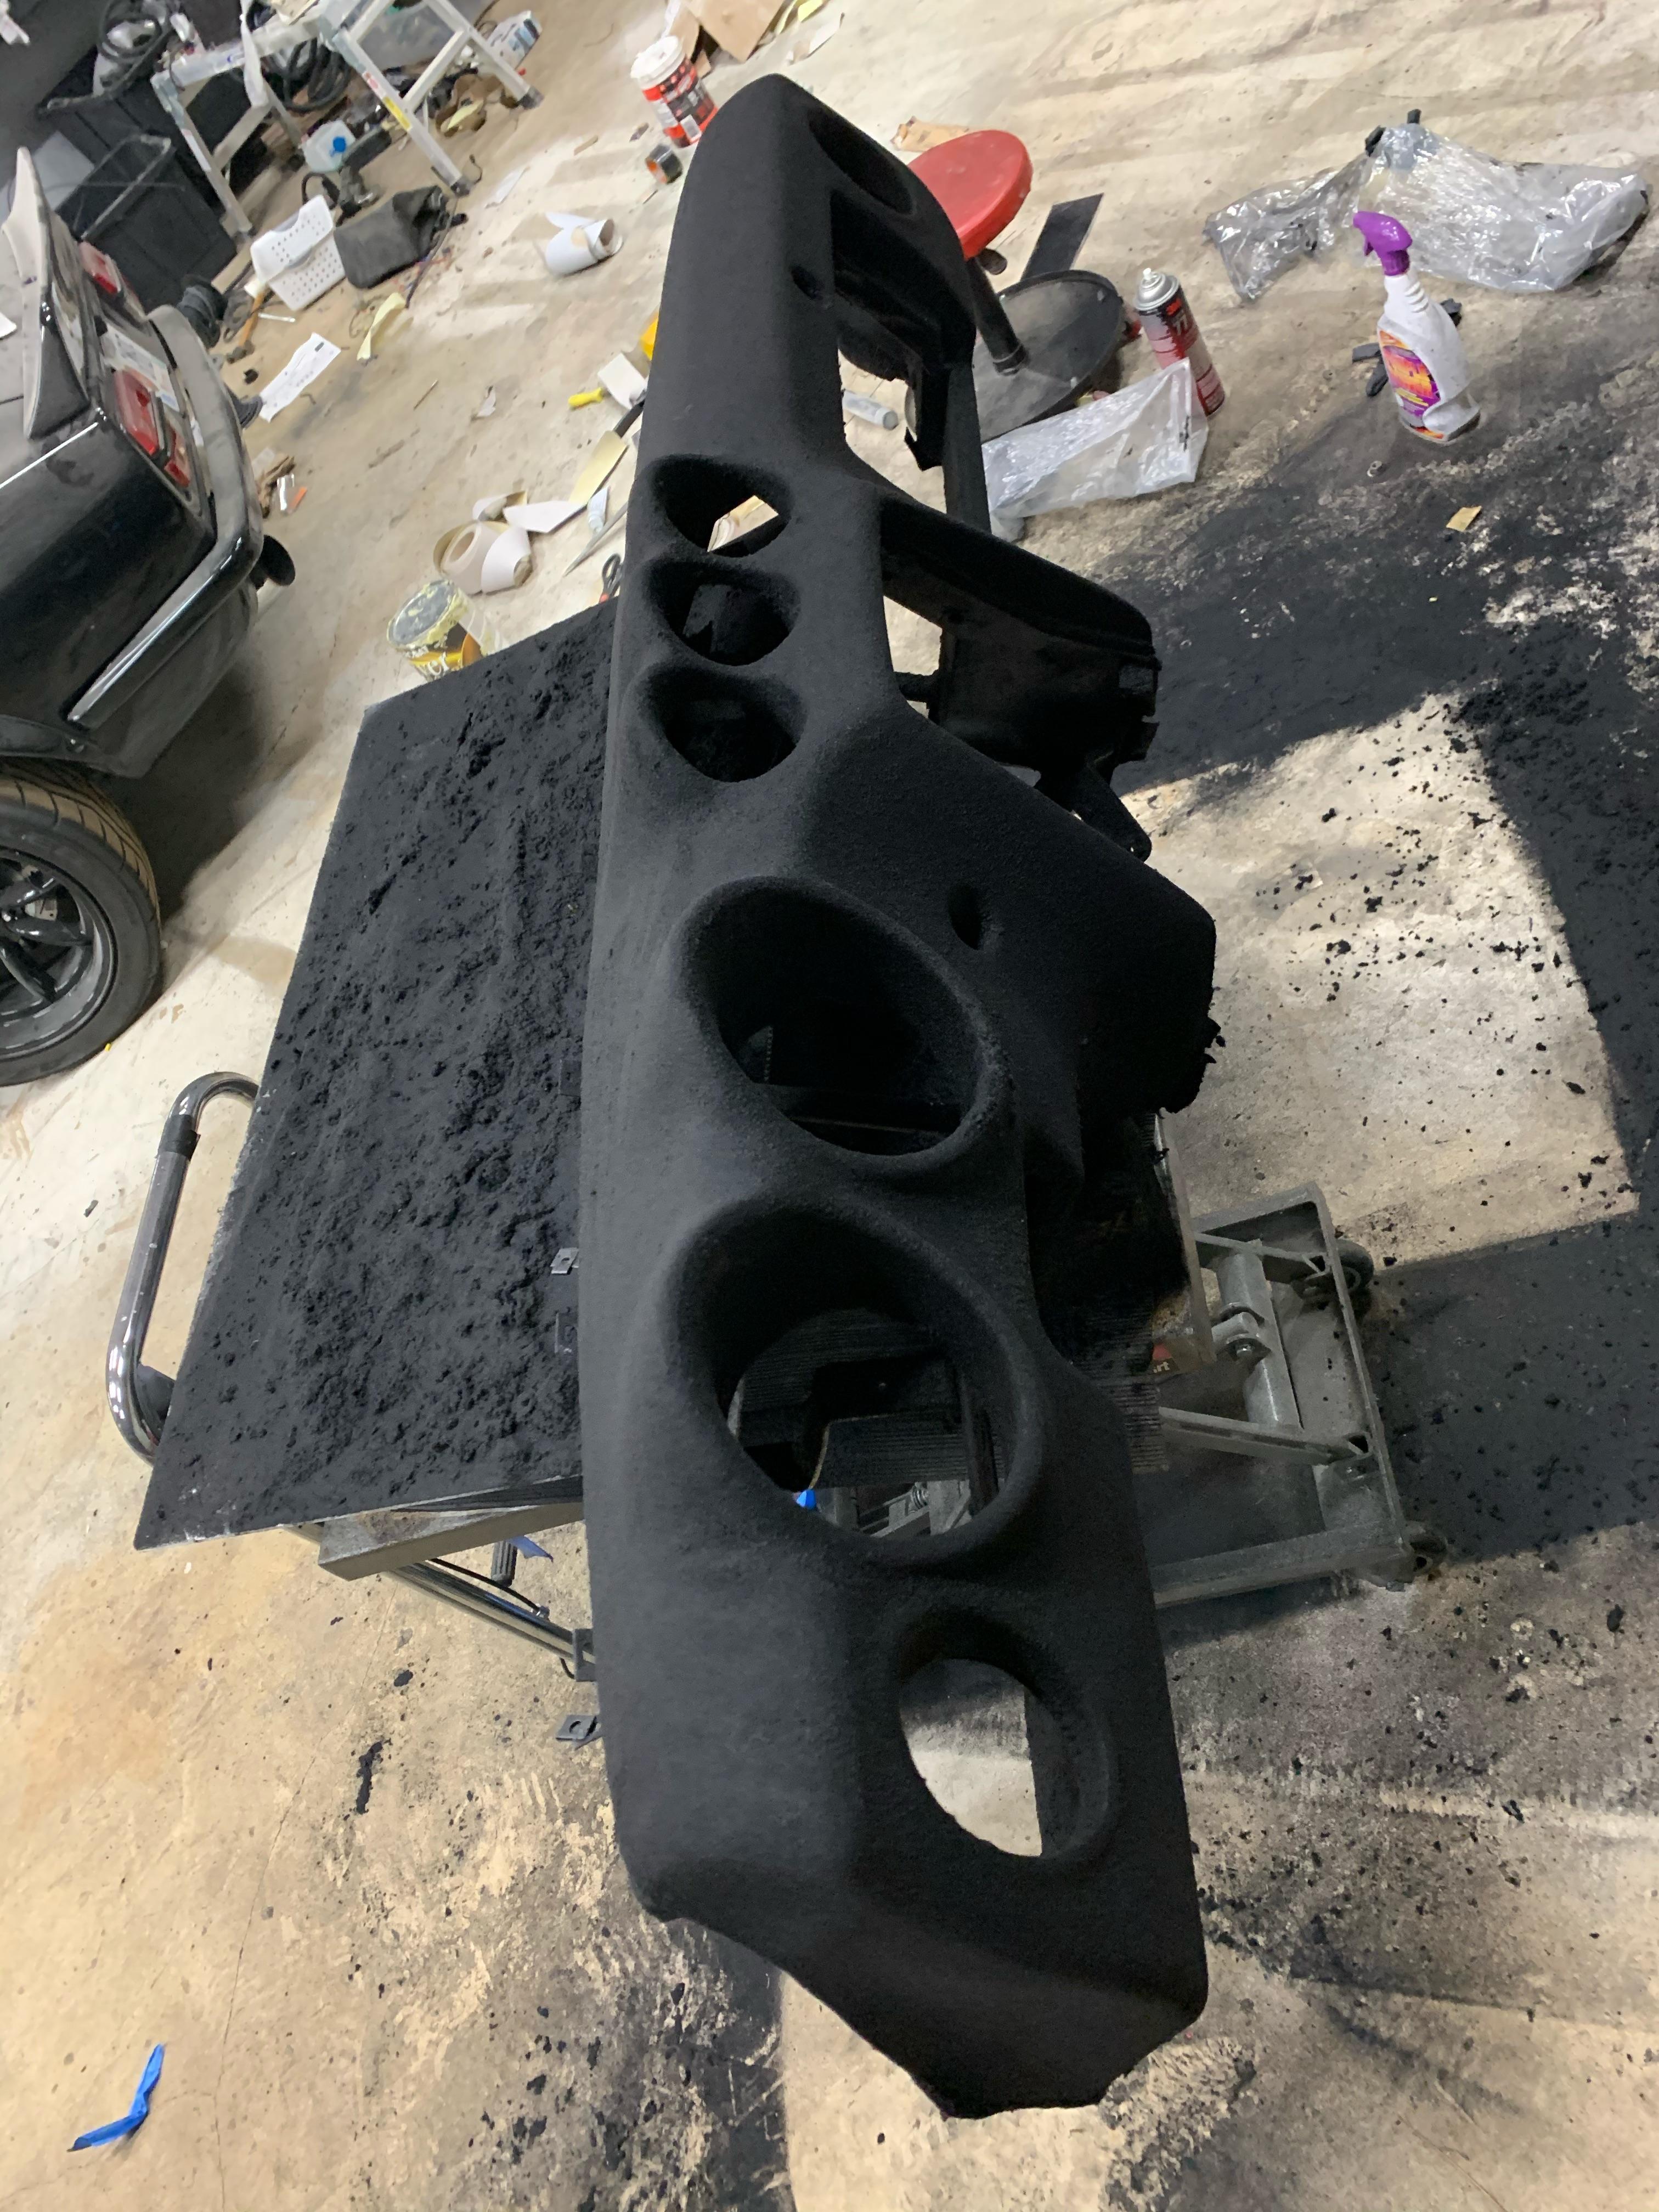
Step 8 - flocking
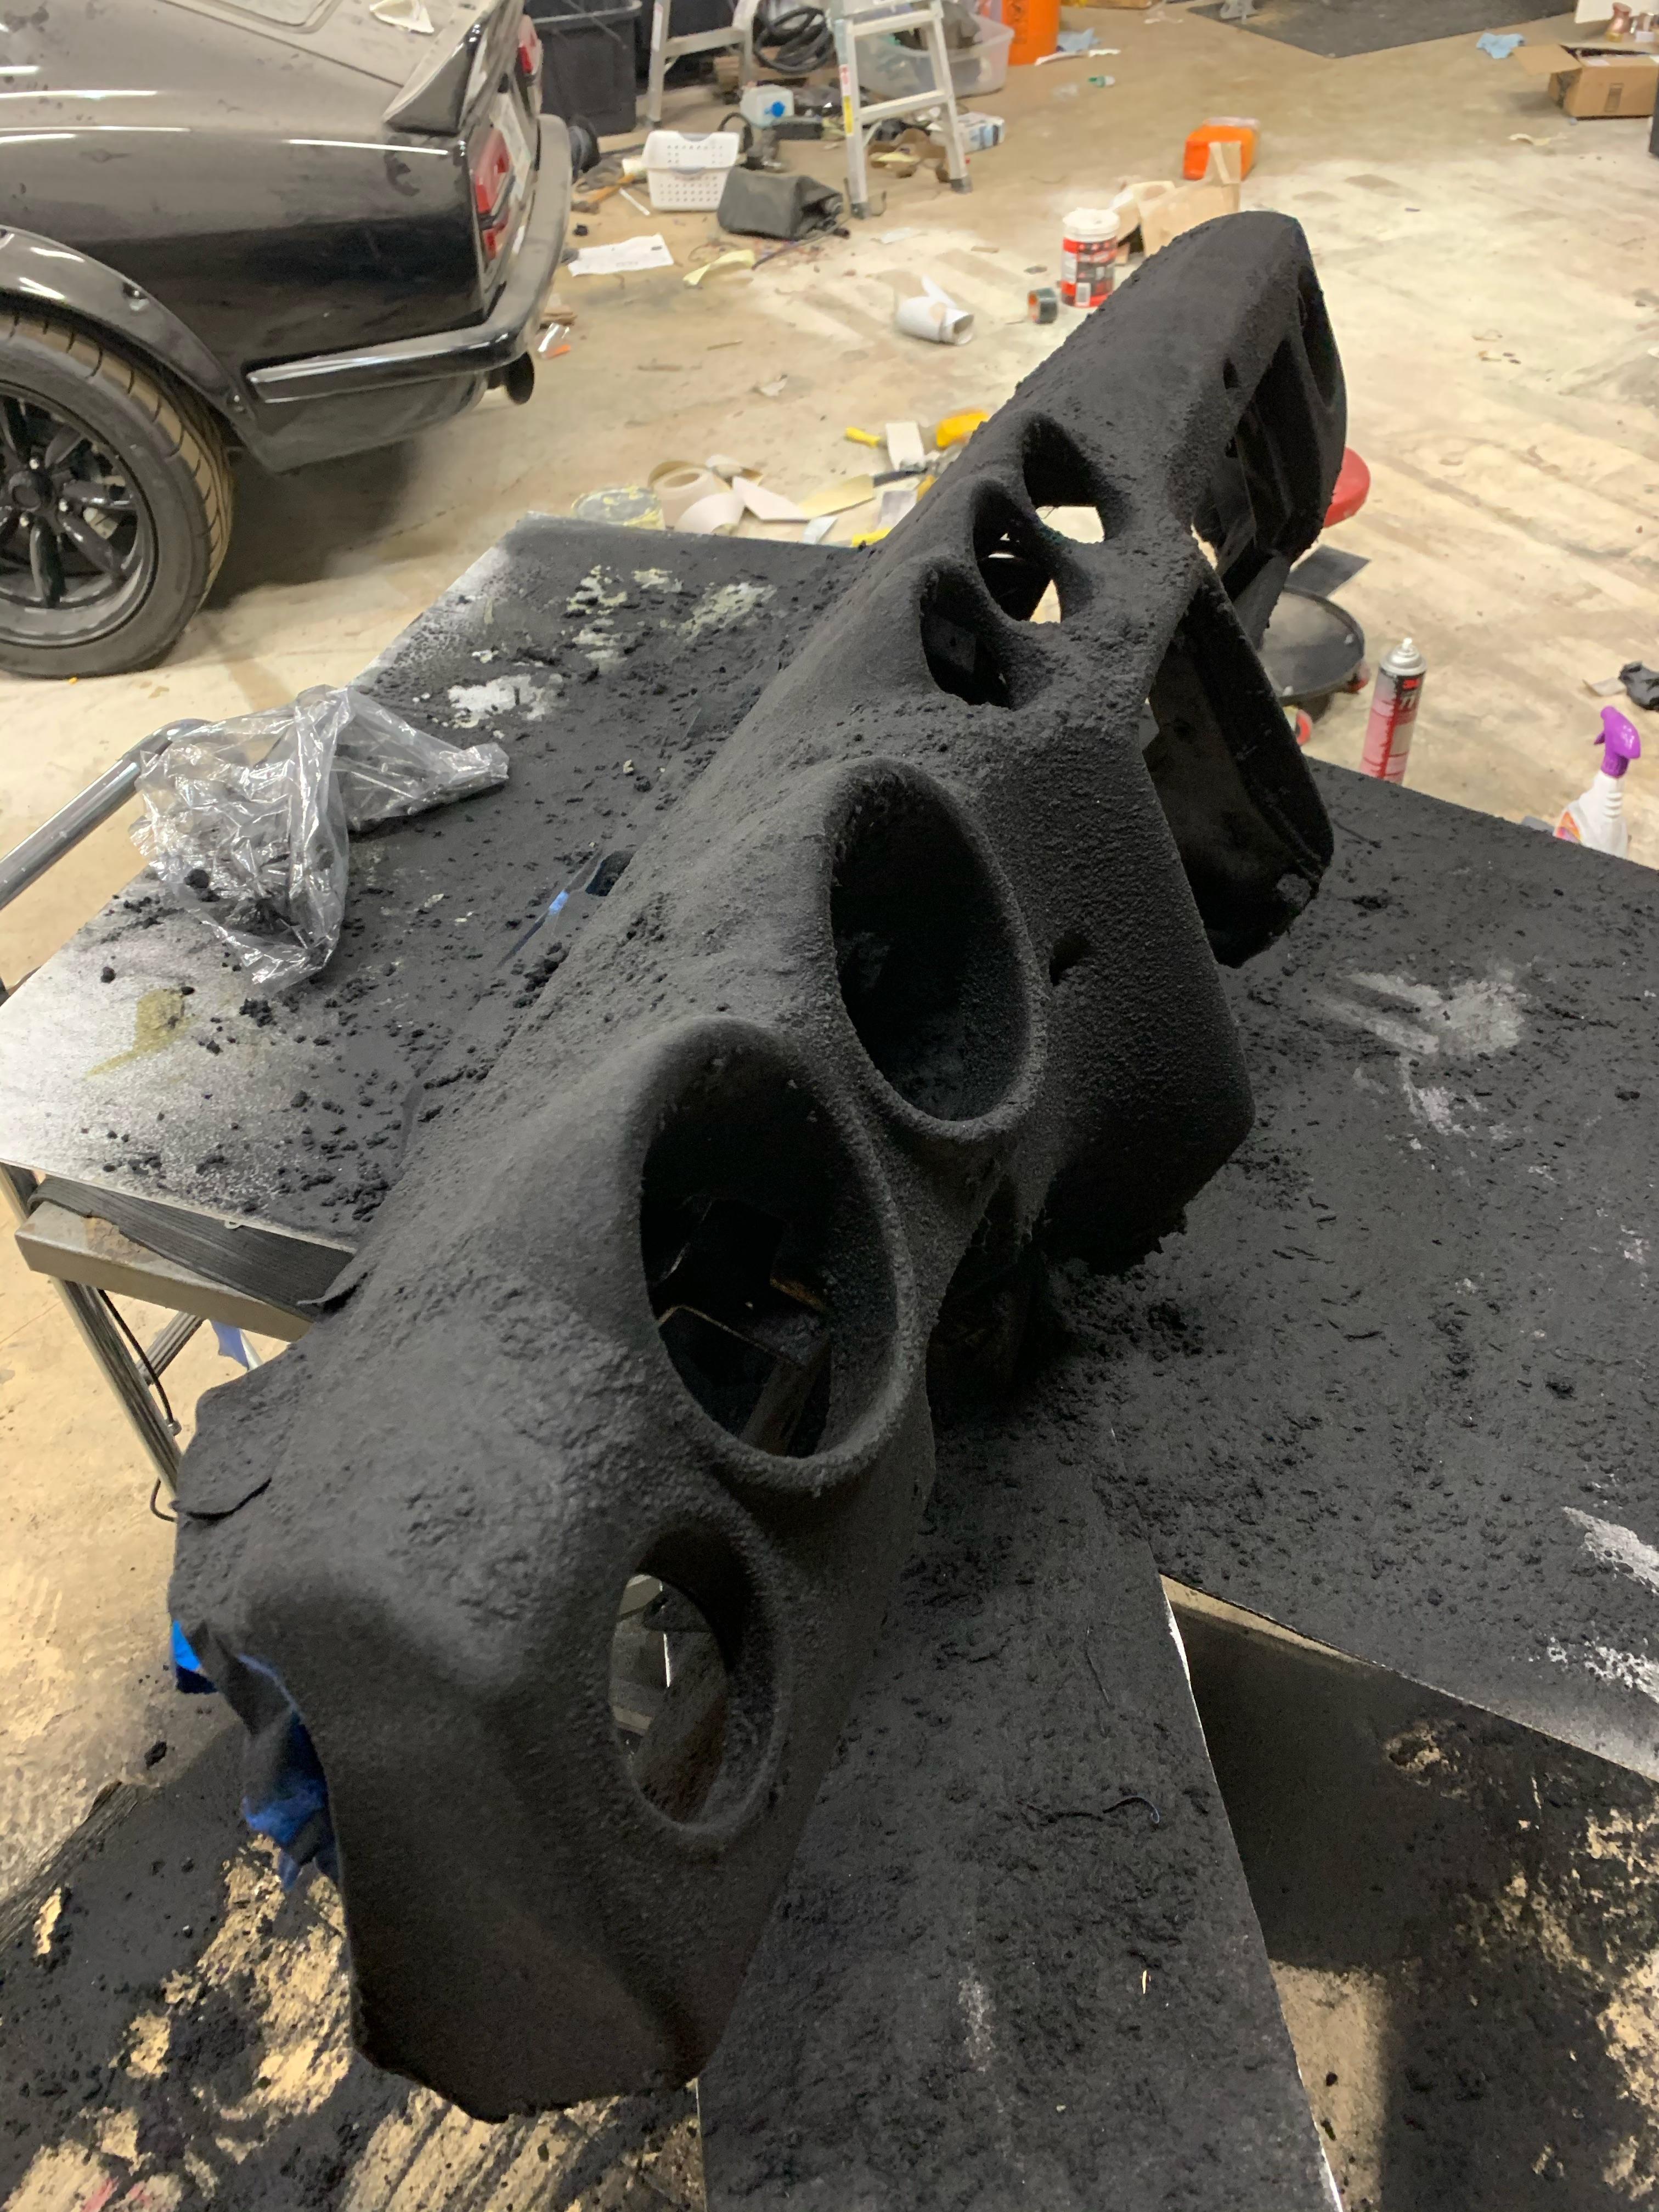
People do flocking in different ways. I recommend re-reading this section a few times before trying my way as it as this is somewhat unique from what I have seen. This is a method that I have found works really well for me which does not involve using a normal flocking adhesive that must be painted on, or a flocking gun.
I prefer to use 3m super77 spray adhesive and find that it works very, very well for holding flocking. You do need to work sort of fast here as the spray adhesive does not have a long cure time. You might test out your methods on a sheet of cardboard first to get the hang of it.
To start, absolutely hose the dash down with 3m super77 spray adhesive without getting any runs - every single nook and cranny should have a uniform amount of spray adhesive. I like to imagine I am spray painting on the adhesive, that’s what it should look like when you’re done.
Once the adhesive is on, - again, working quickly - cover the dashboard in black flocking. I pick up handfulls out of the bag and dump it on or throw it in to some of the tighter areas. It does not need to be uniform - everything just needs covered so the spray adhesive makes contact with the flocking. If you have a flocking gun, you can use it at this step, but it is not required (I own one but did not use it here.)
After everything is covered in flocking, begin patting the flocking on with your hands. Apply a decent amount of pressure to the flocking but don’t smear it. Go over the entire dashboard a few times, patting. Make sure you pat every single spot that you can reach your fingers. We are patting the flocking on after applying to ensure that it really sticks into the spray adhesive. This gives the adhesive a chance to saturate the flocking and really grab it.
Let the dashboard sit overnight in a warm place with the patted flocking sitting on it. Don’t touch it! Don’t think about touching it! We want the adhesive to cure. 3m says this takes 24 hours.
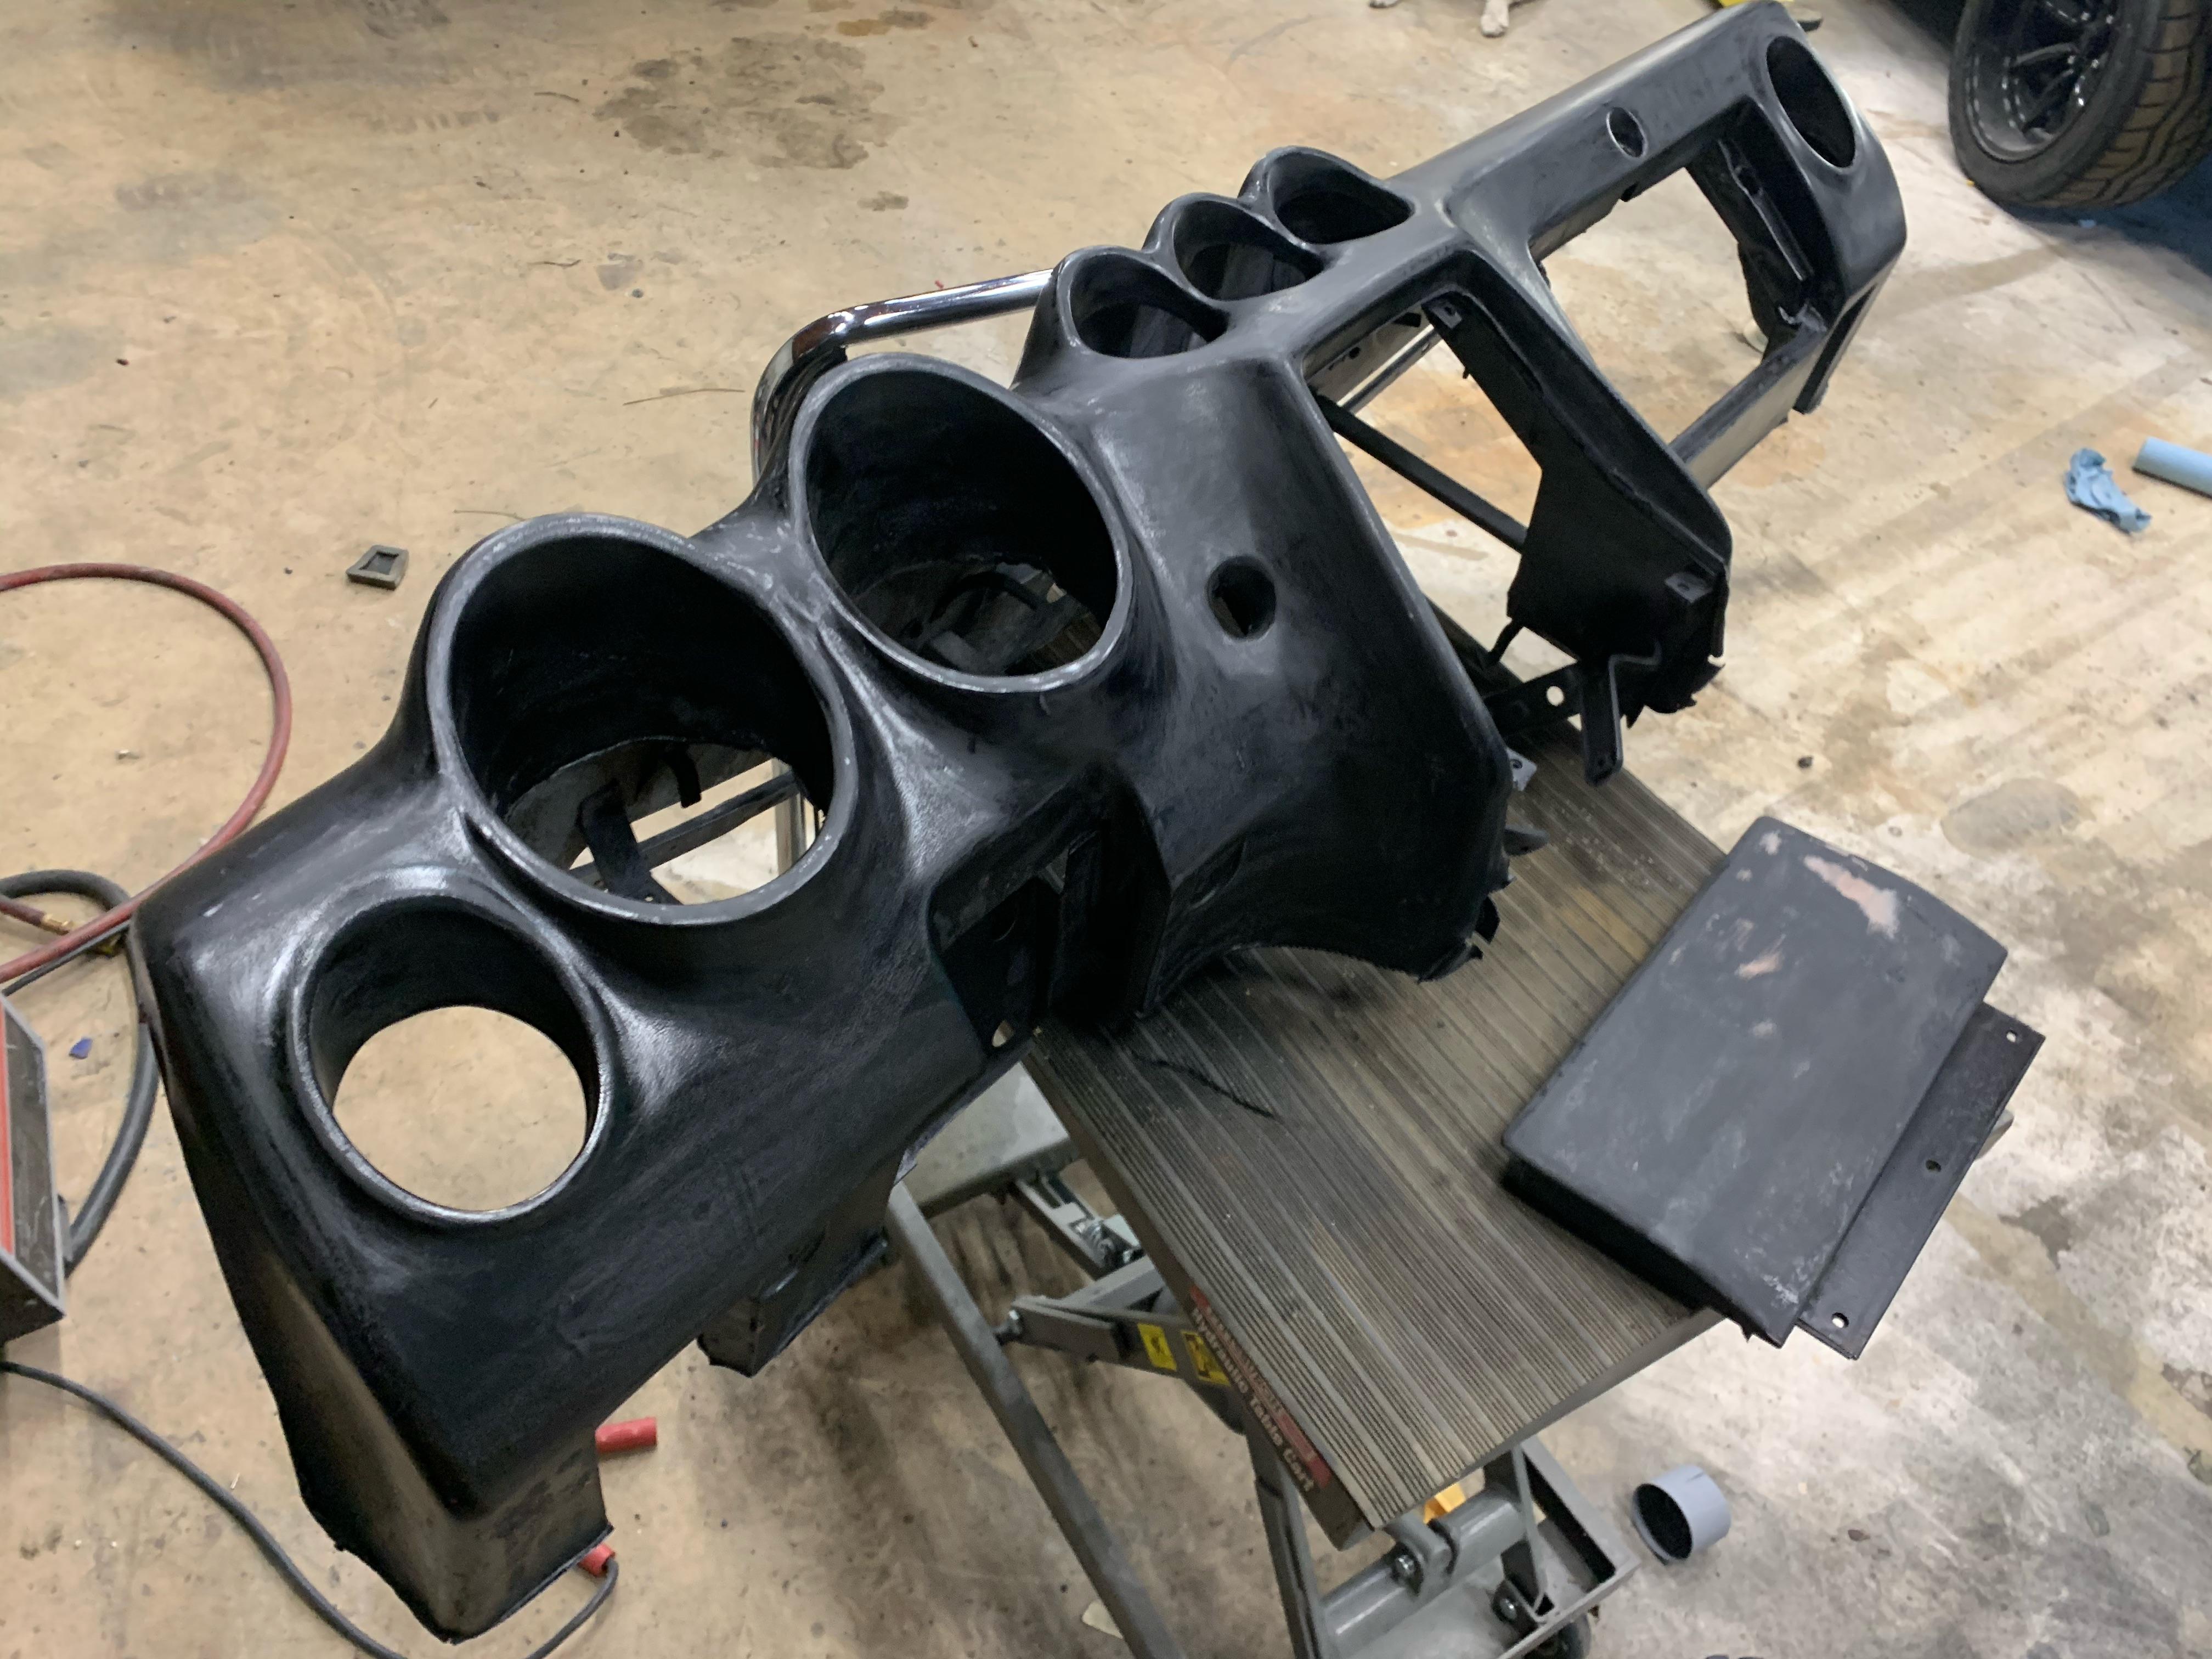
After the dashboard as sat for a while, gently dust off the flocking. I collect the used flocking in a bag and re-use it as bits of dirt or debris don’t tend to cause any problems with using flocking.
You are done. Now we get to put things back together.
Note! If you are not interested in the flocking, one can skip this and instead shoot the dash in a textured paint. With this, you can get a similar to factory appearance.
Step 9 - gauge and accessory reinstall
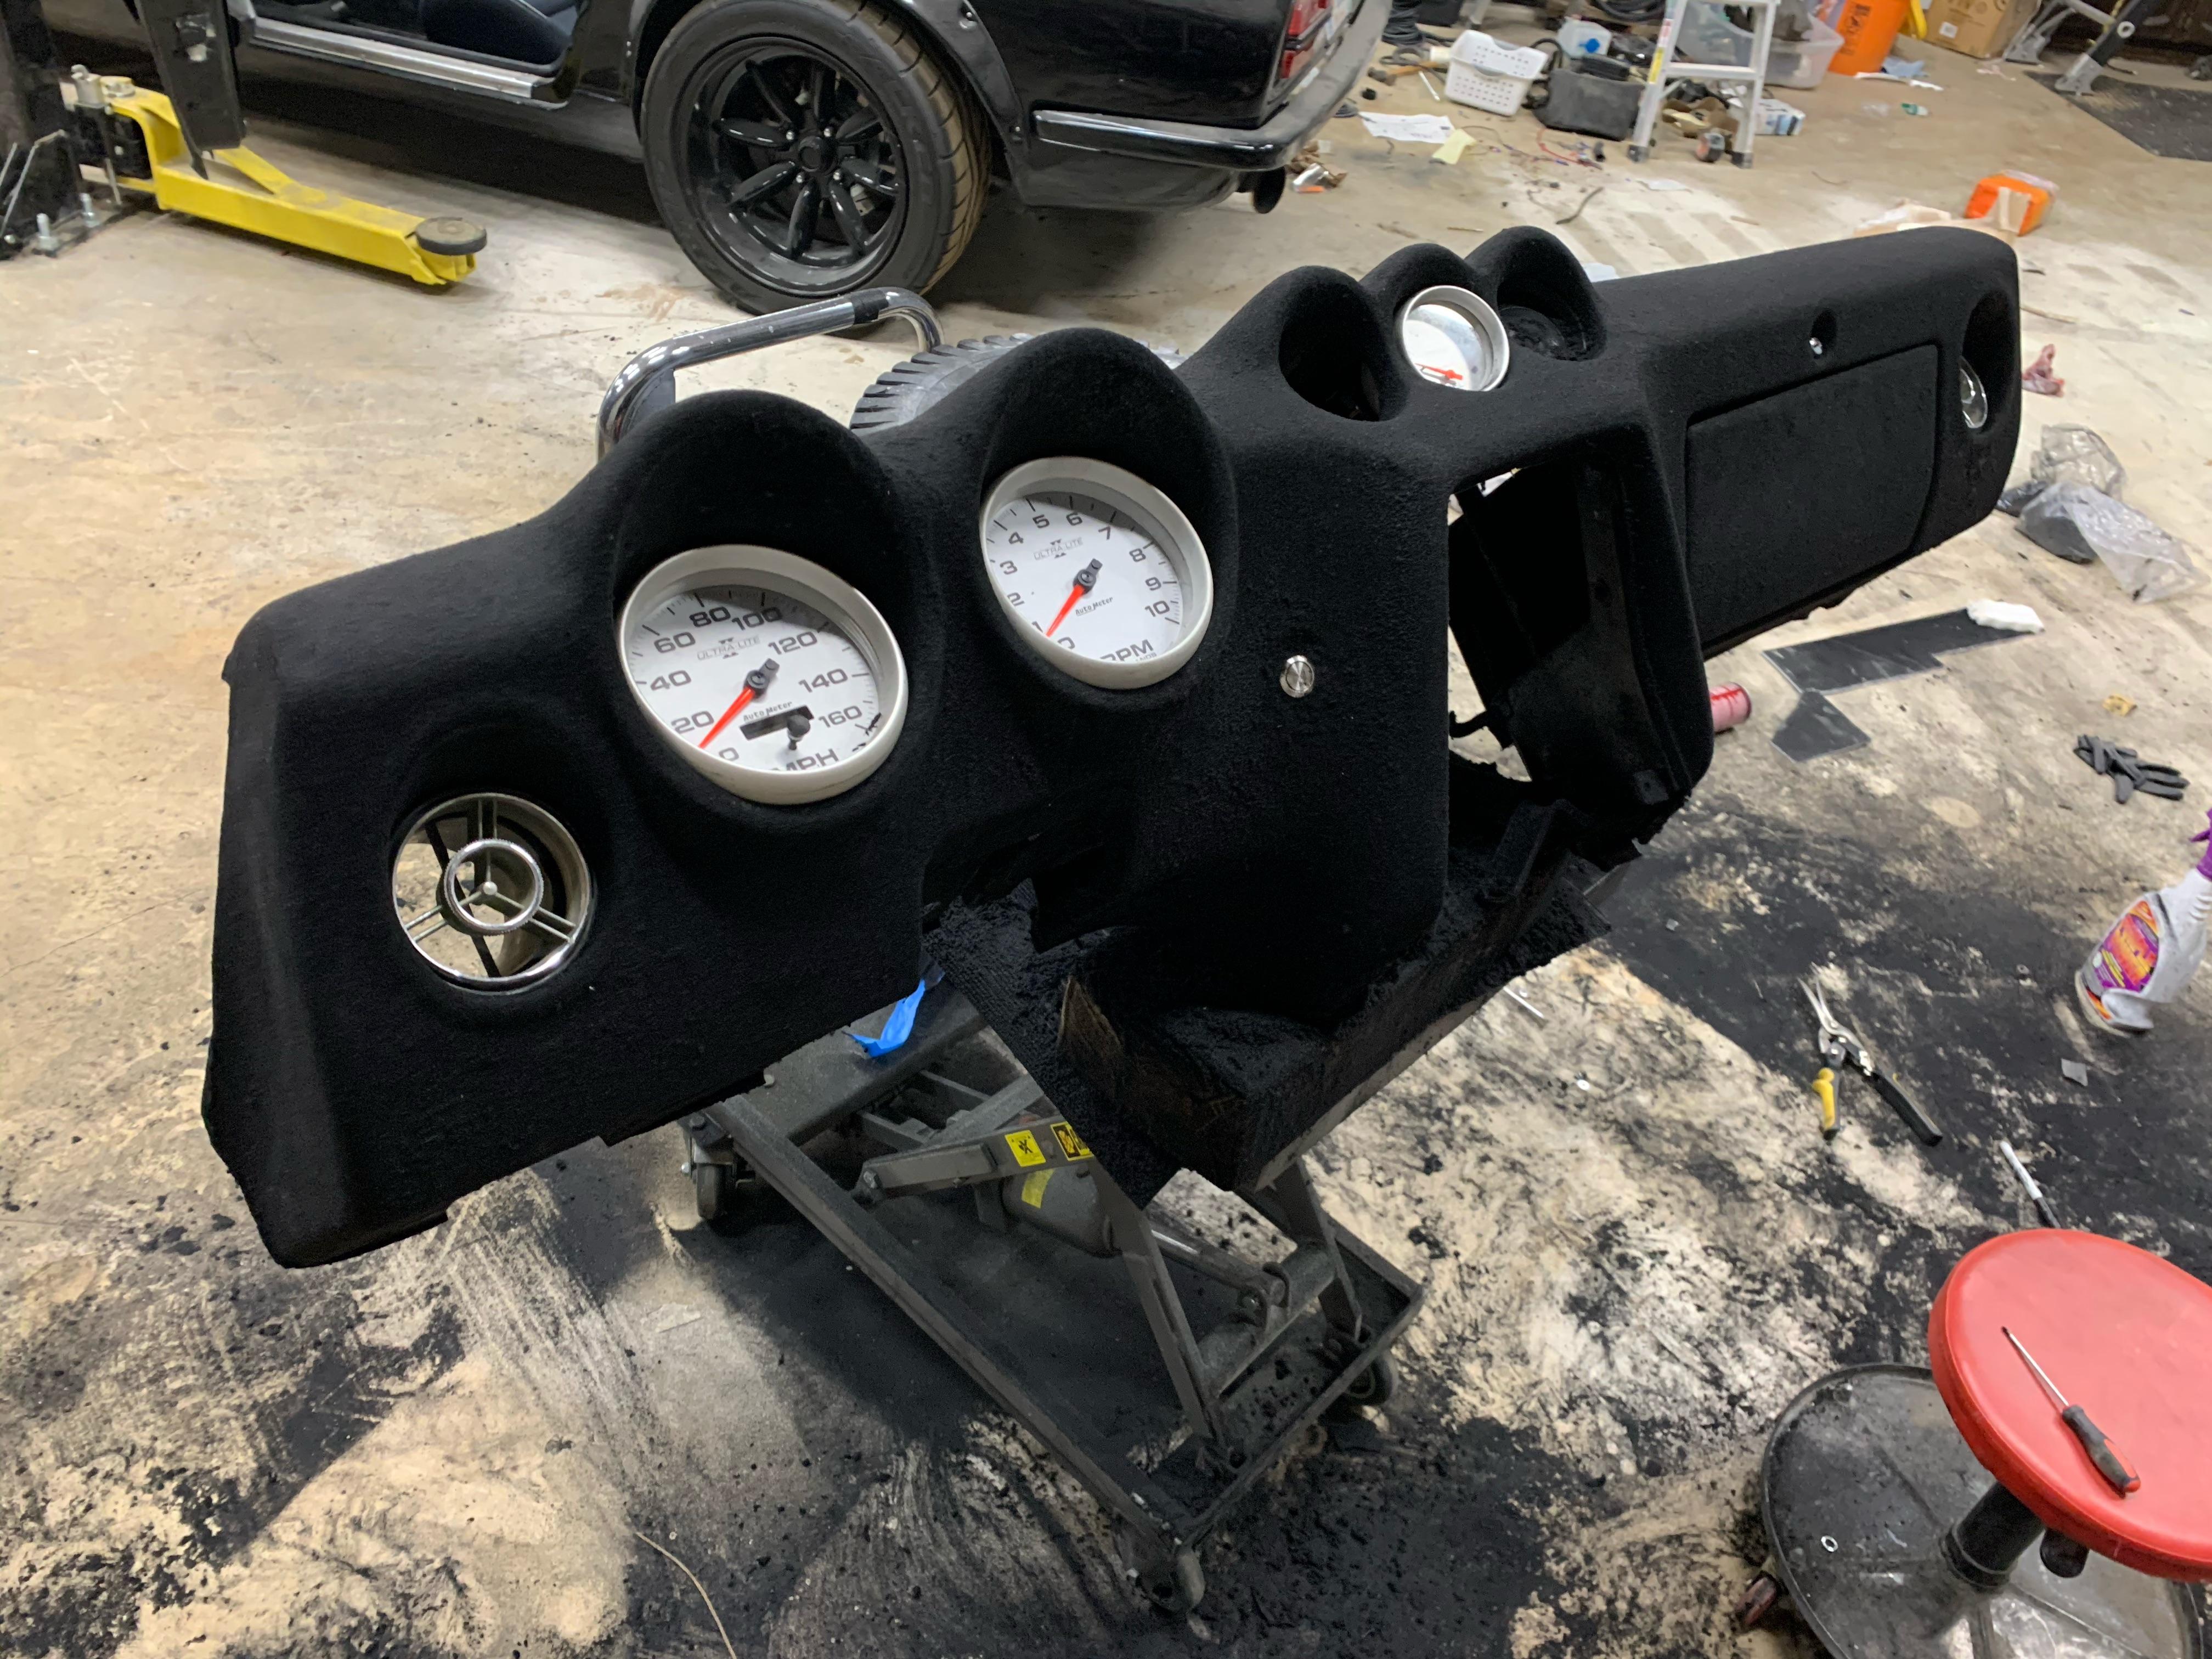
Here, the gauges are reinstalled, air ducts reinstalled, glove box lid reinstalled. Notice that the glovebox lid is flocked too!
Step 10 - dashboard is back in the car
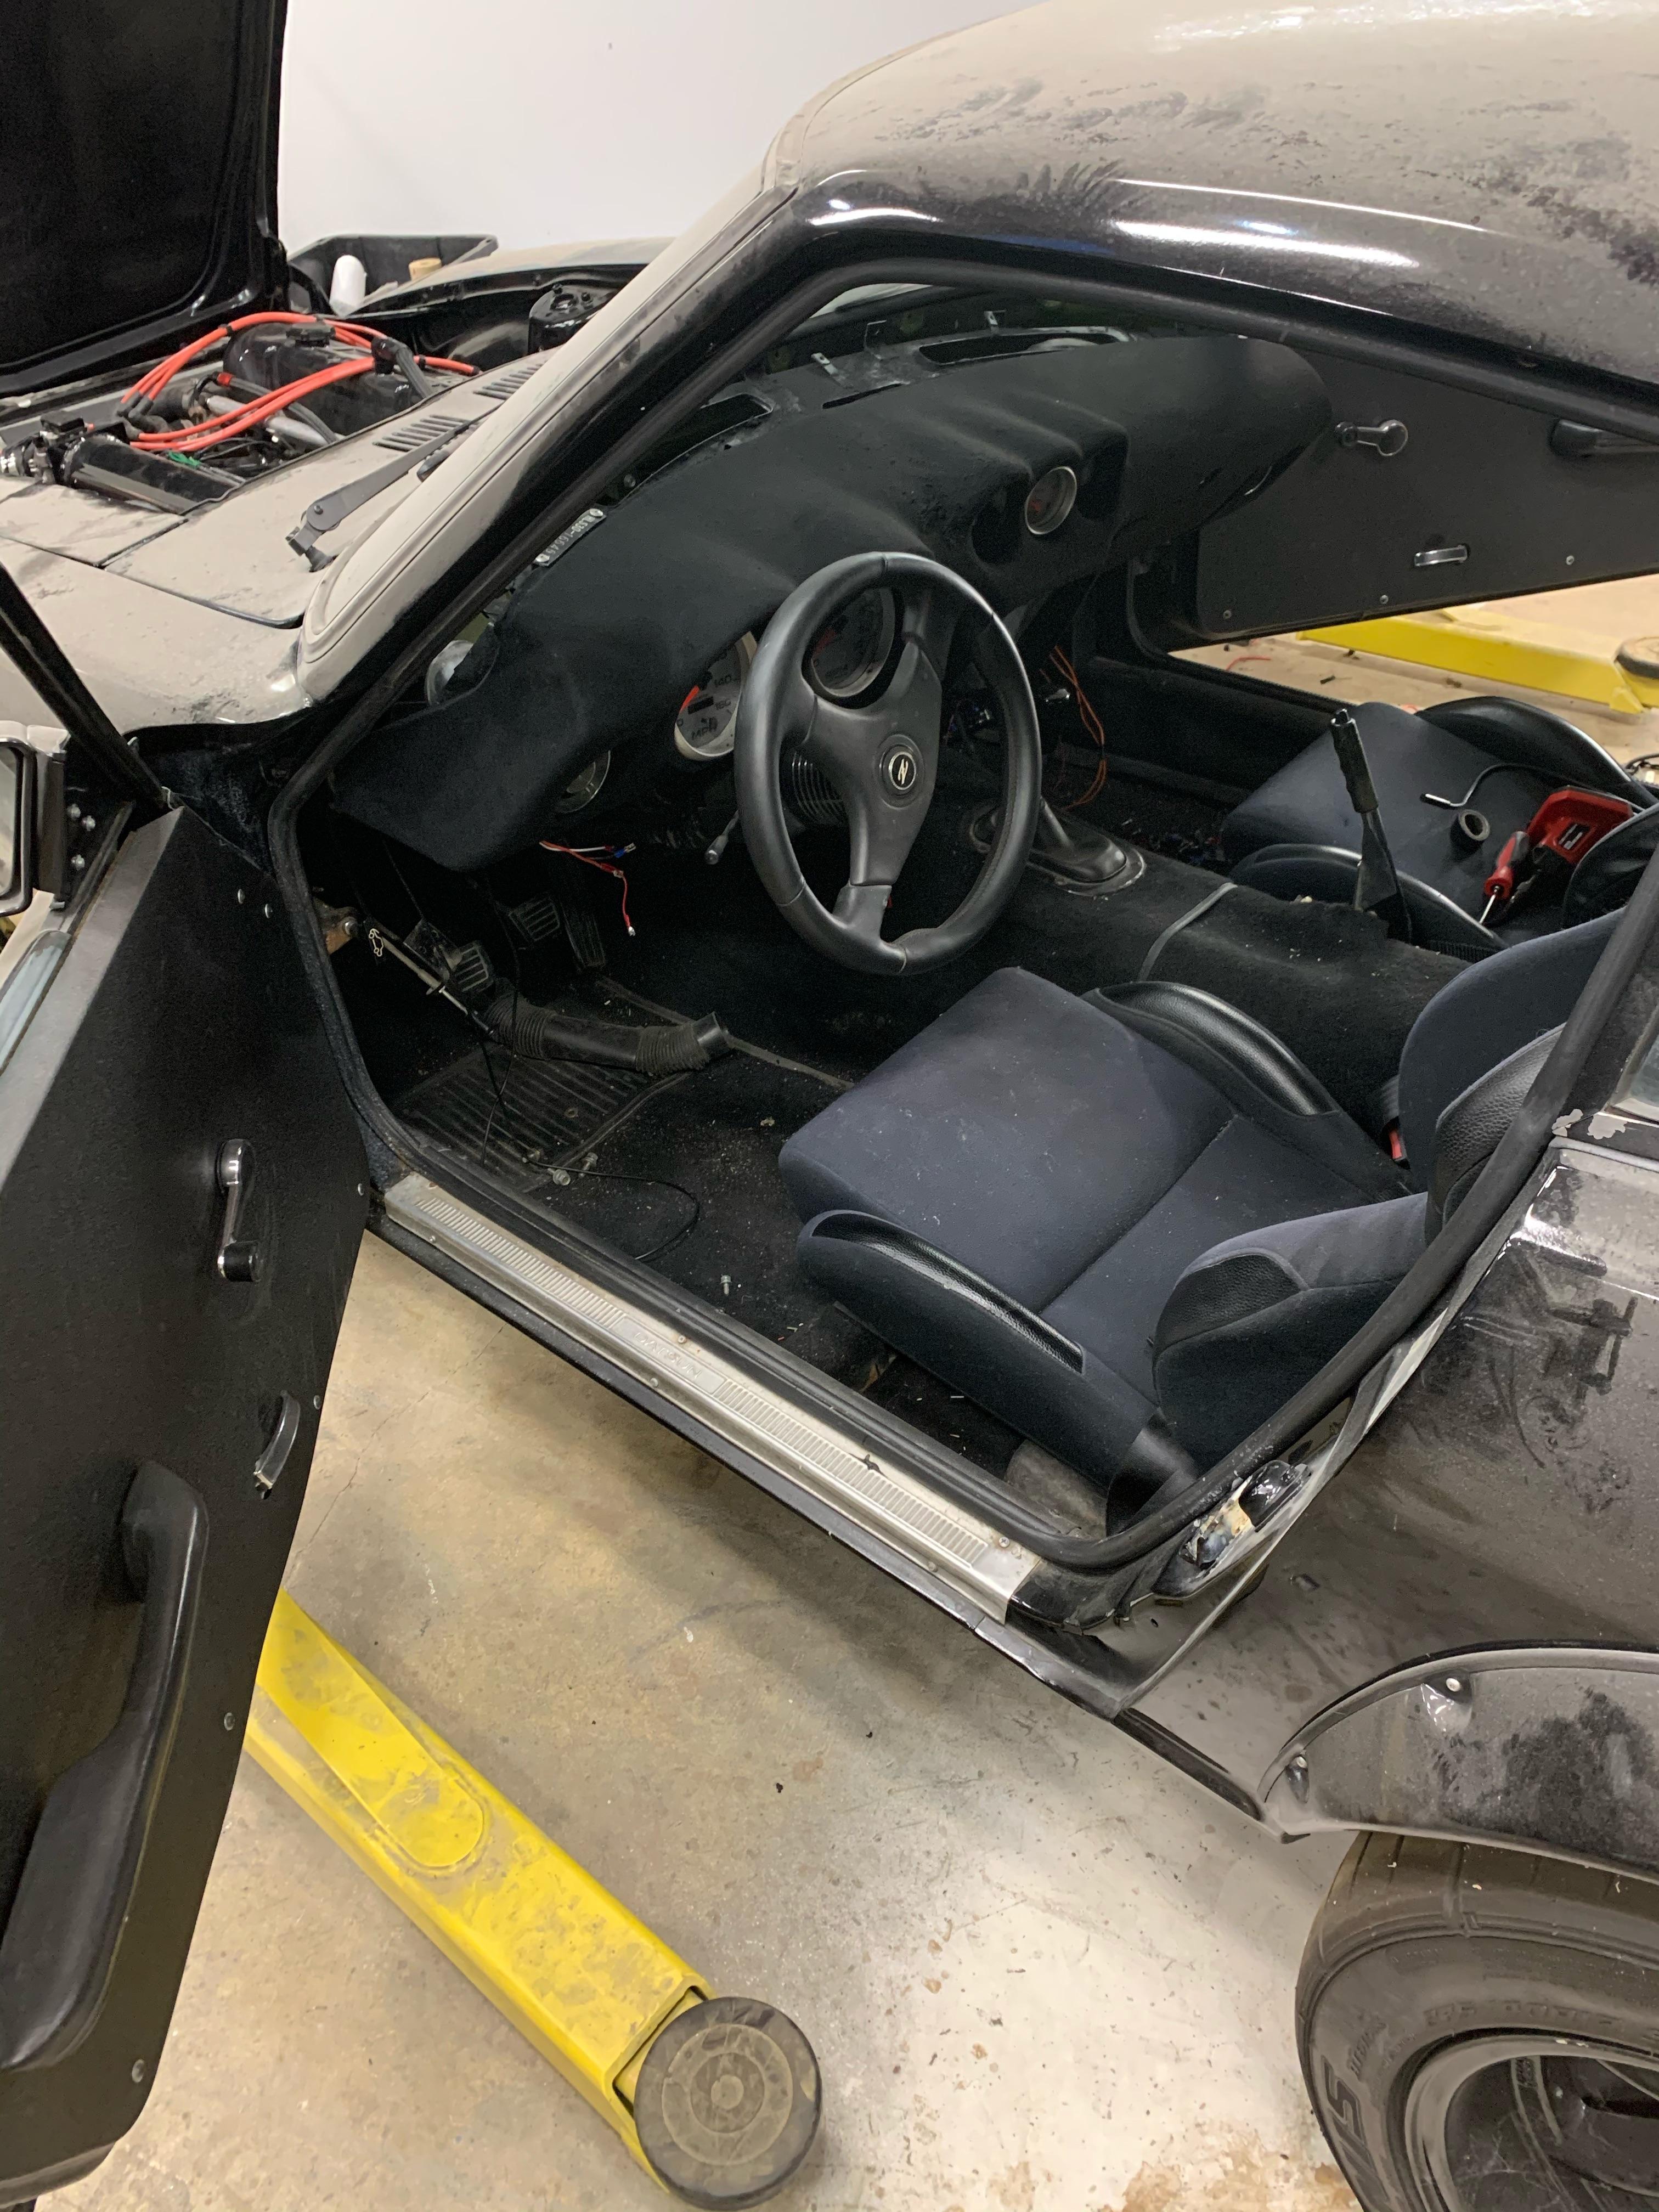
Here we see the dash going back in. We can see a gentle fight with some wiring and air ducts happening
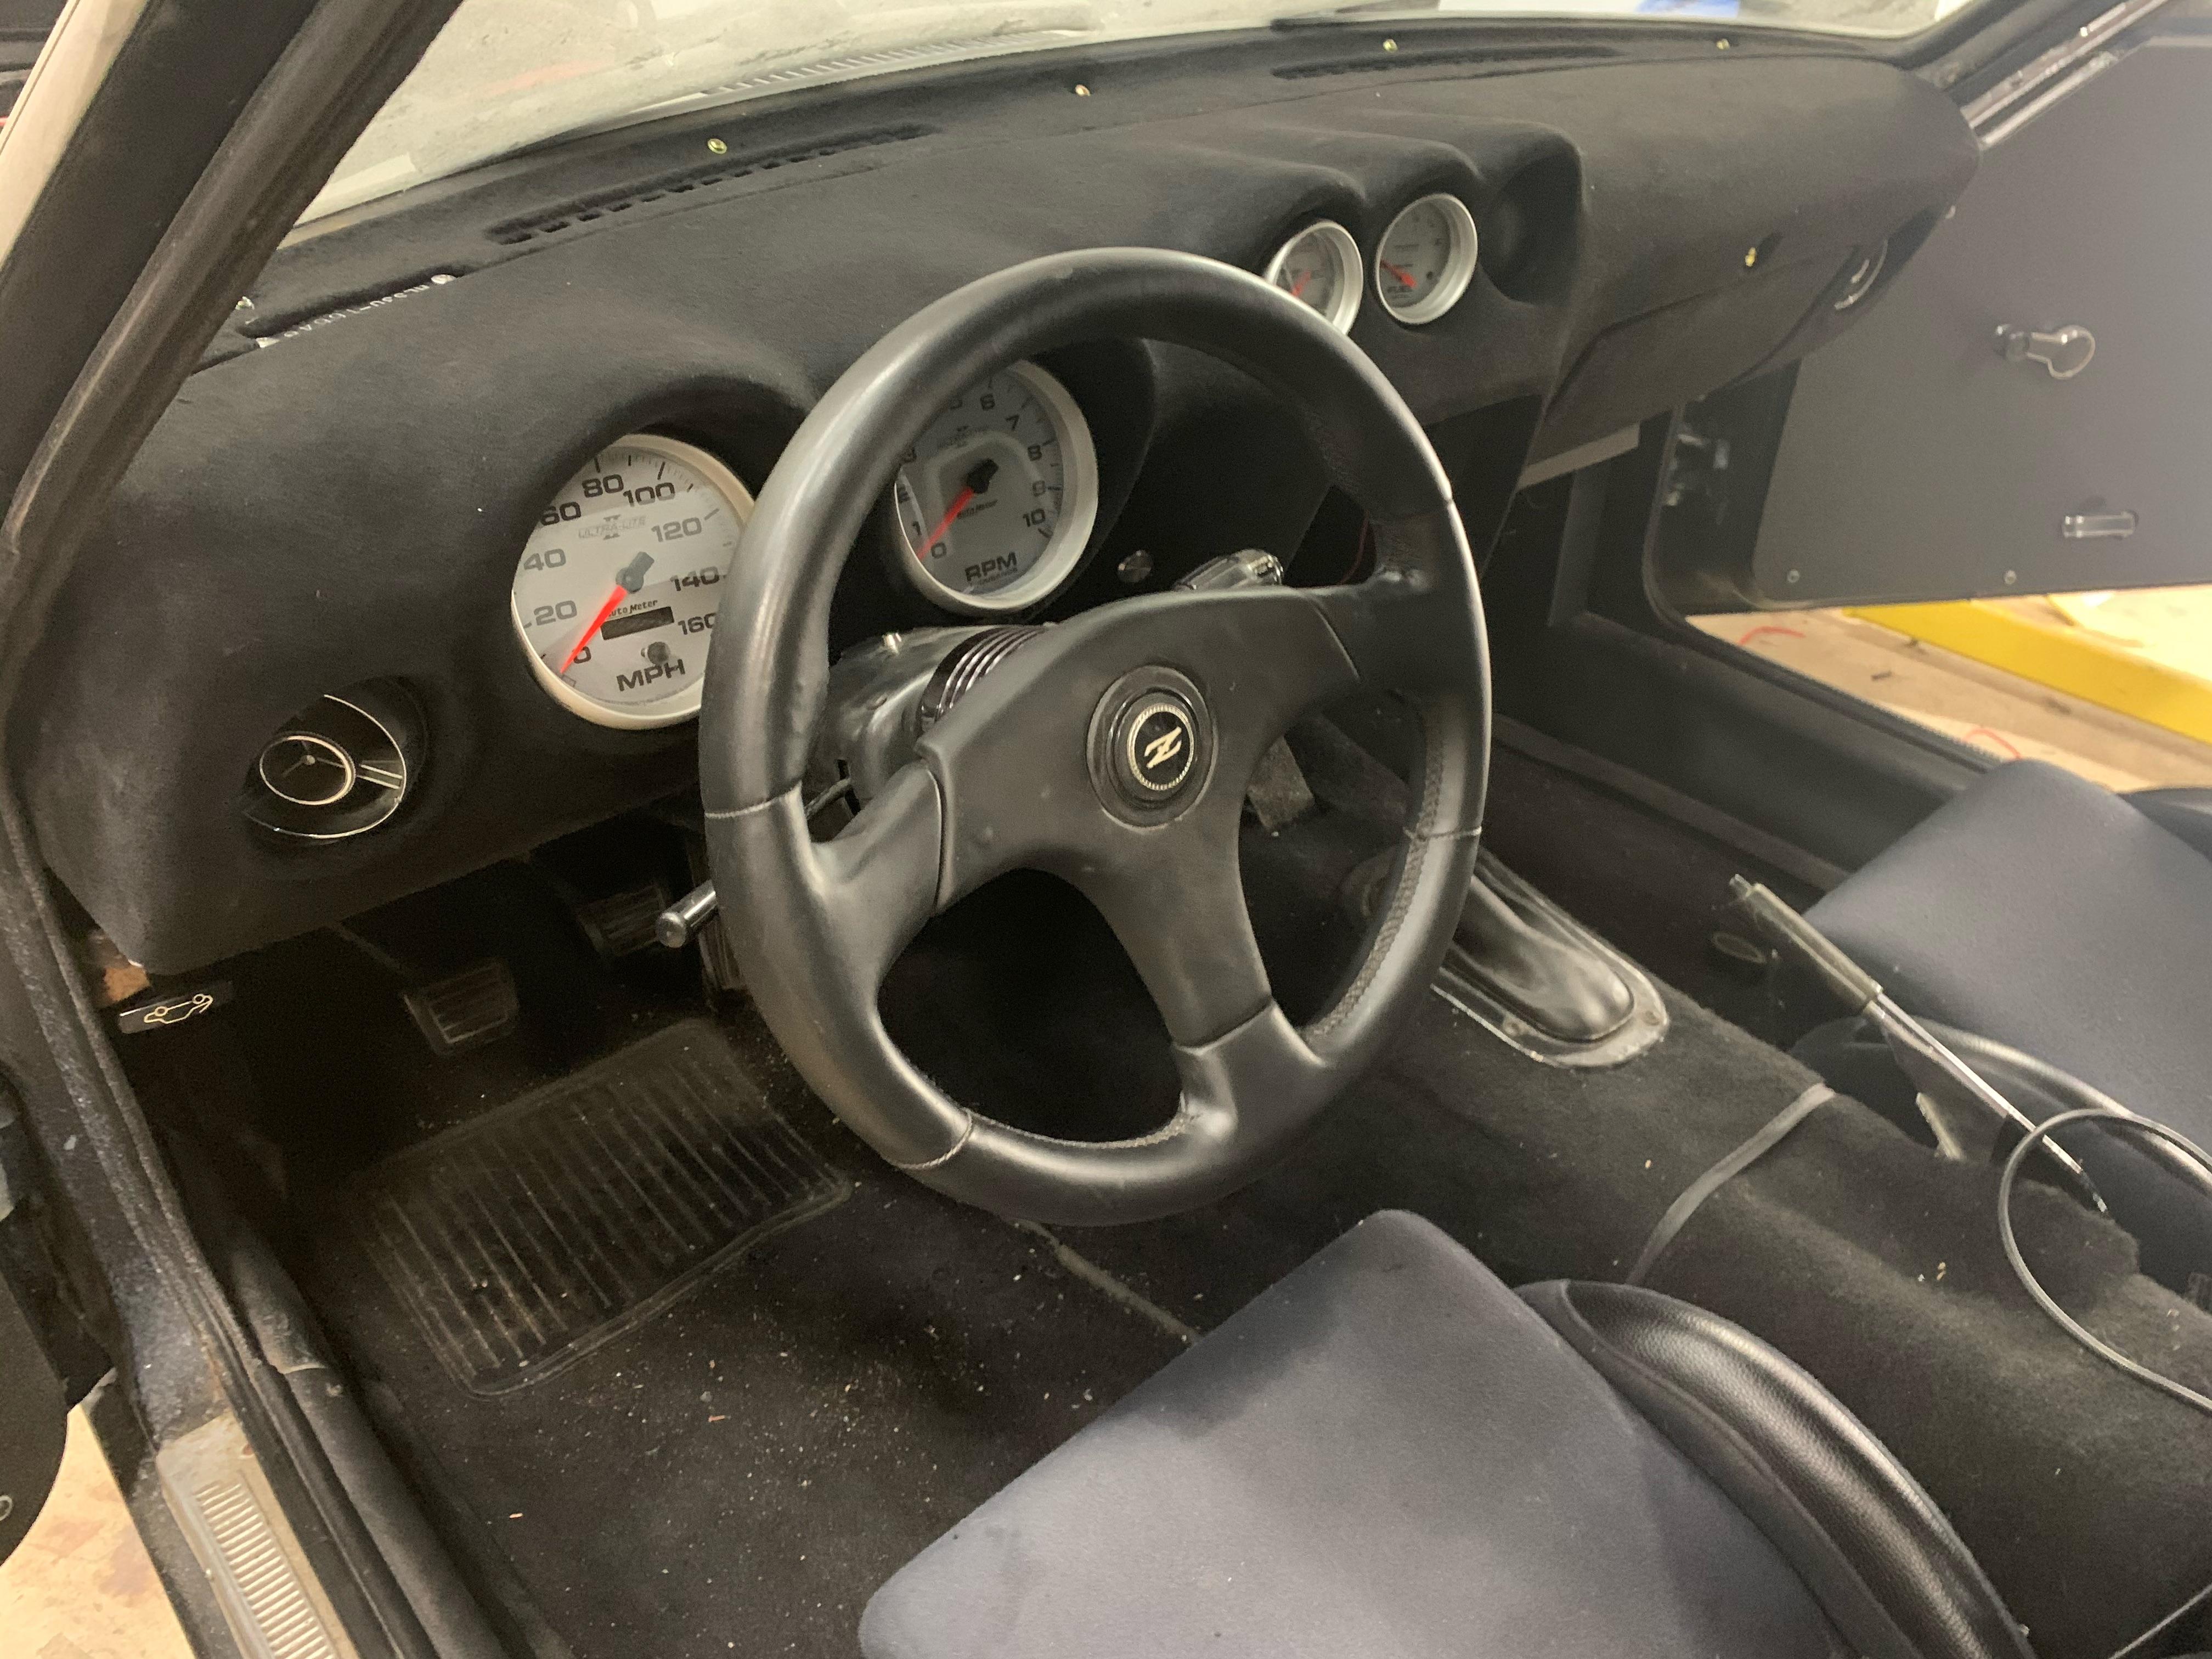
The dash is fully back in the car – and the car needs cleaned. We’re all done :)
reinstall complete, final thoughts
Thanks for reading!
After having honed this method on a few dashboard after trying and failing to achieve a nice look with other methods (some listed in the links below) I have found that this is a great way to achieve a nice dashboard for a very reasonable price.
Any questions, comments, project pics of your own to share? Contact me, I’d love to hear about how your project is going
related links for further reading
Obviously I didn’t come up with most of the ideas here on my own. I leaned on others’ similar projects and simply added my own twist. Here are some links to ones that I found helpful:
- (https://zcarguide.com/repair-dashboard-datsun-z/)
- (https://forums.hybridz.org/topic/121551-dash-vinyl-repair/)
- (https://www.classiczcars.com/forums/topic/22325-dash-repair-processpictures/)
- (https://www.polyvance.com/280Z-Dashboard-Repair/)
Did you enjoy my post?
I'm really excited about the work that I'm doing here. If you enjoyed my post and my work, please consider tipping me with a coffee. I appreciate you taking the time to read my post!